2.6 KiB
| title | description | position | category | menuTitle |
|---|---|---|---|---|
| Table & Columns | Table and Columns Creation | 11 | Setup and Usages | Table and Columns Creation |
Table Creation
Once you have created a new NocoDB project you can open it, In the browser, the URL would be like example.com/dashboard/#/nc/project_id.
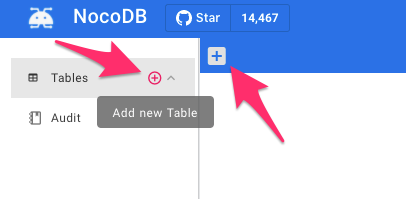
Now you can start creating new tables, so let's begin the table creation by simply clicking one of the following options.
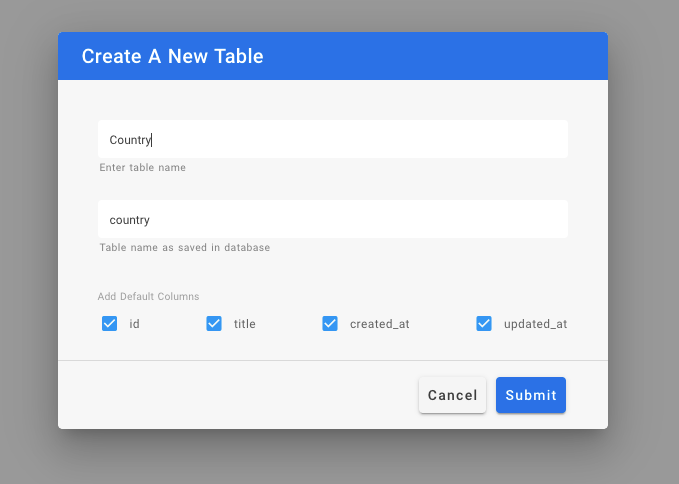
On click, it will popup a table create a modal popup, in which you can enter the table name alias and table name. Enable/disable default columns and finally click the Submit button.
You can't disable the
idcolumn since we need a primary column for the table.
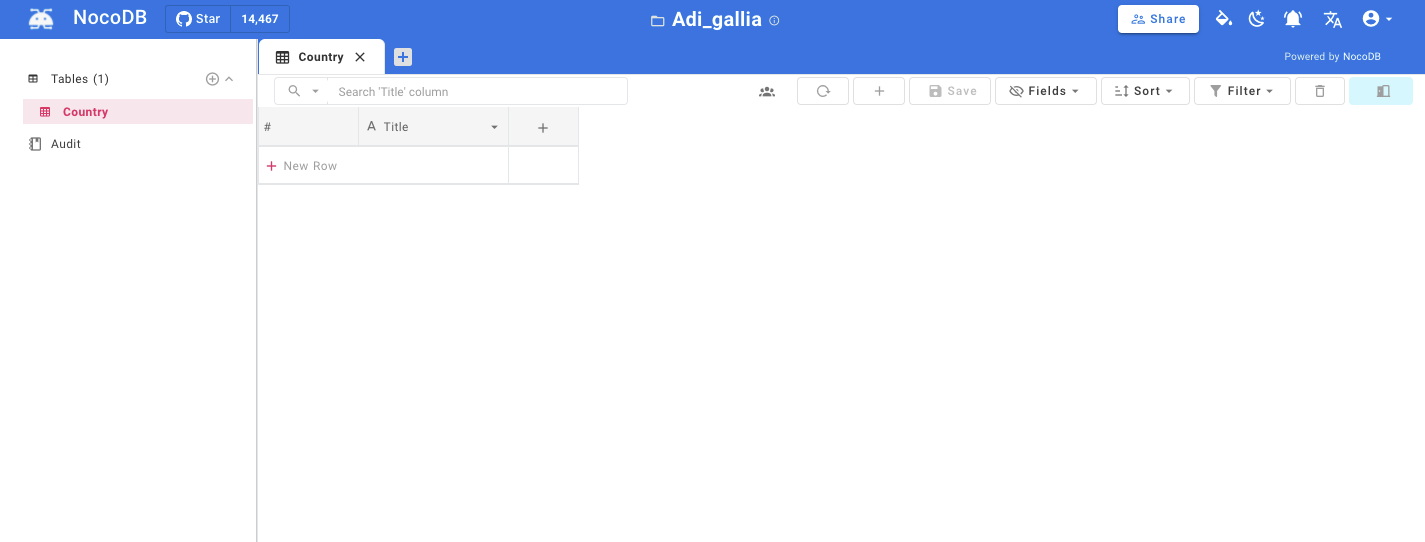
After the successful submission, the table will create and open as a new tab.
Column Creation
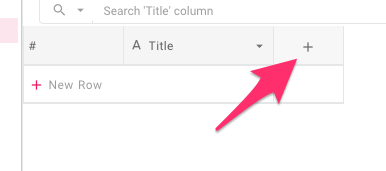
Adding a column is simple, you have to click the + icon on the right corner of the table.
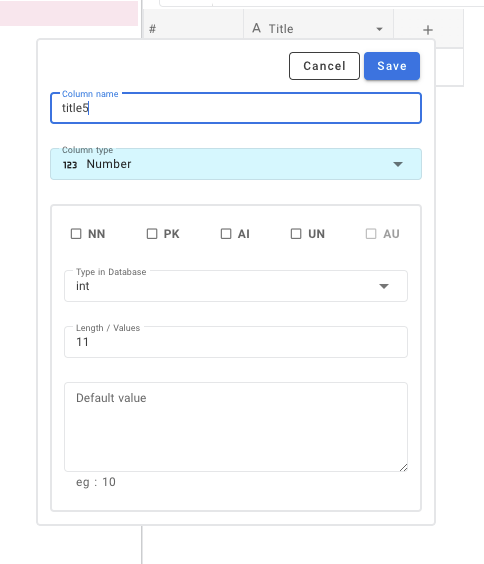
After the click, it will show a menu and you can enter the column name and choose the column type (Abstract type) from the column type. And finally, you can click the save button to create the new column.
For more about Abstract type click here.
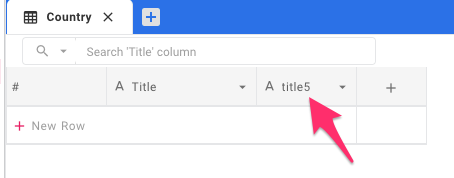
Finally, we have our new column as part of our table.
Row creation
For adding new values to the table we need new rows, new rows can be added in two methods.
Using Form
-
Click the
+icon in the toolbar of the table tab. -
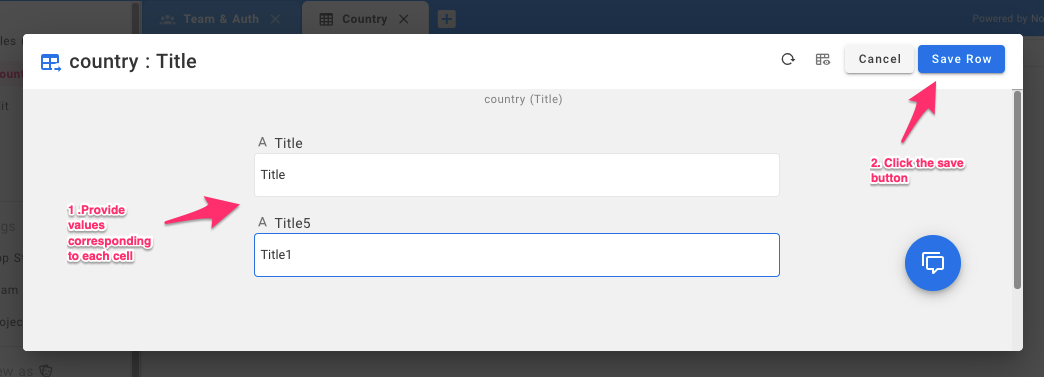
Now it will open a modal Form to enter the values, provide the values and press the save button.
