7.7 KiB
| title | description | position | category | menuTitle |
|---|---|---|---|---|
| Webhooks | Webhooks | 1030 | Developer Resources | Webhooks |
Triggers
Webhooks allows user to trigger on certain operations on following database operations
- AFTER INSERT
- AFTER UPDATE
- AFTER DELETE
The triggers will trigger asynchronously without blocking the actual operation.
Applications/services
| Trigger | Details |
|---|---|
| Send email to certain email addresses | |
| Slack | Notify via Slack channel |
| Microsoft Teams | Notify via Microsoft Teams channel |
| Discord | Notify via Discord channel |
| Mattermost | Notify via Mattermost channel |
| Twilio | Send SMS to certain mobile numbers |
| Whatsapp Twilio | Send Whatsapp messages to numbers using Twilio |
| URL | Invoke an HTTP API |
Accessing Data: Handlebars
The current row data and other details will be available in the hooks payload so the user can use handlebar syntax to use data.
We are using Handlebars library to parse the payload internally.
Example
For a table with column names (id, title, created_at, updated_at).
For INSERT/ UPDATE based triggers, use following handlebars to access corresponding data fields.
- {{ data.id }}
- {{ data.title }}
- {{ data.created_at }}
- {{ data.updated_at }}
Note that, for Update trigger - all the fields in the ROW will be accessible, not just the field updated. For DELETE based triggers, only {{ data.id }} is accessible representing ID of the column deleted.
For all trigger, following user information associated with person trigger can be accessed.
- {{ user.id }} : Unique auto incremented NocoDB system value
- {{ user.email }} : User E-mail.
- {{ user.roles }} : User Role amongst [Owner, Creator, Editor, Commenter, Viewer].
JSON format
Use {{ json data }} {{ json user }} to dump complete data & user information available in JSON format
Additional references:
Application Guide
Discord
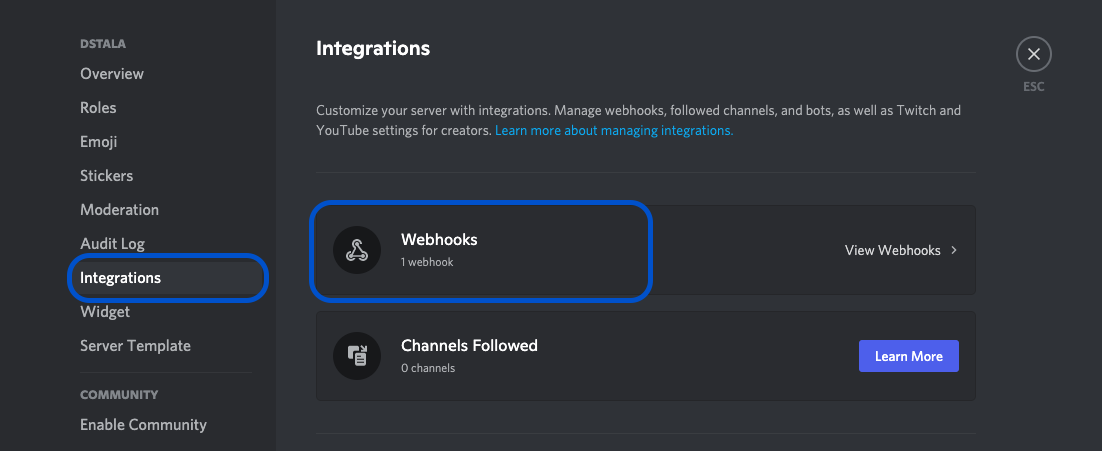
1. Create WebHook
- On Discord, open your Server Settings and head into the Integrations tab:
- Click the "Create Webhook" button to create a new webhook!
- Choose channel to which this webhook will post to.
- Copy webhook URL
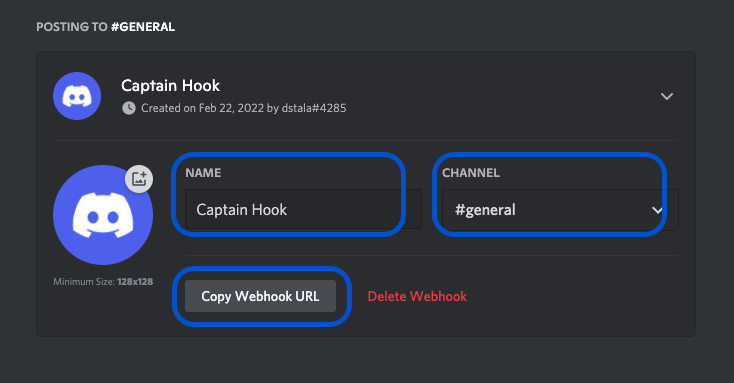
(Sample webhook URL: https://discord.com/api/webhooks/945558283756908644/GNUtiGuzfOky6wZ4ce30XuXc1sbPK3Od7EC-4t6hihh5Fovv6oU9OsdT6mGuoL1QlTzj).
Detailed procedure for discord webhook described here.
2. Install Plugin
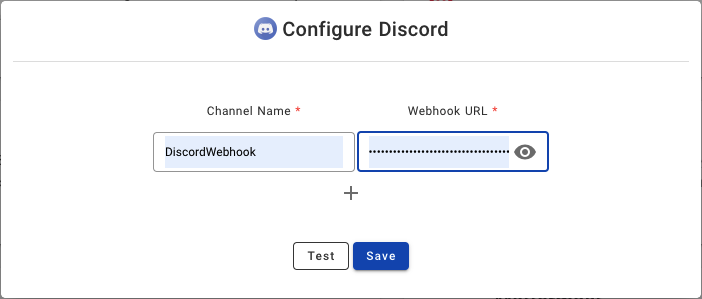
- Open 'App Store' (under Settings), hover over Discord tile. Click 'Install'.

- Provide a name of your choice (not to be confused with Discord Channel name).
- Paste Discord Webhook URL copied from Step (1.) above.
3. Configure
- Open project, associated table.
- Click 'More' > 'Webhooks'.
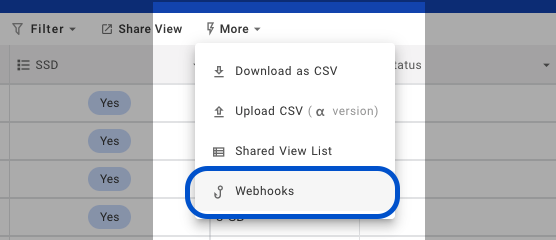
- Click 'Add New Webhook'
- Configure
- Title: Name of your choice to identify this Webhook.
- Event: Trigger event. Choose between.
- After Insert: Trigger event for new ROW insertion.
- After Update: Trigger event for existing ROW updation.
- After Delete: Trigger event for ROW deletion
- On Condition: [Optional] Enable if you wish to associate additional condition/constraint with the trigger configured above.
- Notification: Select 'Discord'.
- Select Discord Channels: Select from the drop down list, channel name configured in Step (2). Please click on 'Reload' if drop down list is empty.
- Body: Message to be posted over Discord channel, via webhooks on trigger of configured event.
- Body can contain plain text &
- Handlebars {{ }}
Slack
1. Create WebHook
- Details to create slack webhook are captured here
2. Install Plugin
- Procedure remain same as listed for DISCORD channel configuration above
3. Configure Webhook
- Procedure remain same as listed for DISCORD channel configuration above
Microsoft Teams
1. Create WebHook
- On Teams, open your channel, click on three-dots menu (far right) and select 'Connectors'

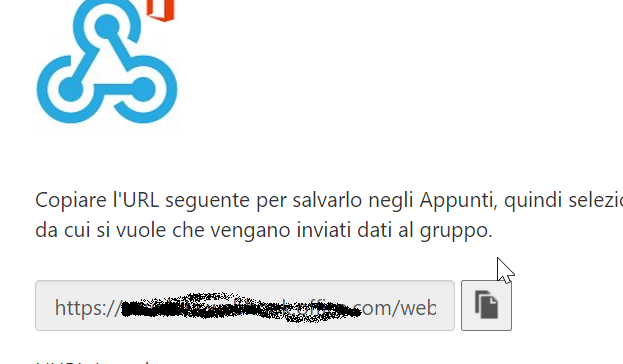
- Select incoming webhook & click 'Configure'

- Create webhook, Copy webhook URL
2. Install Plugin
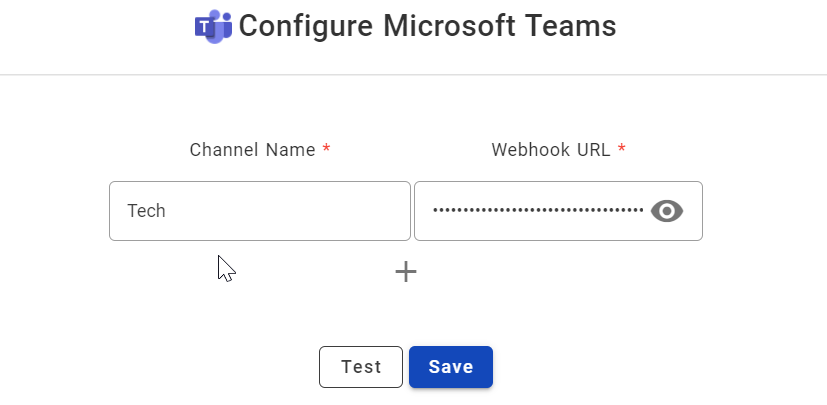
- Open 'App Store' (under Settings), hover over 'Microsoft Teams' tile. Click 'Install'.

- Provide a name of your choice (not to be confused with Teams Channel name).
- Paste MS Teams Webhook URL copied from Step (1.) above.
3. Configure
- Open project, associated table.
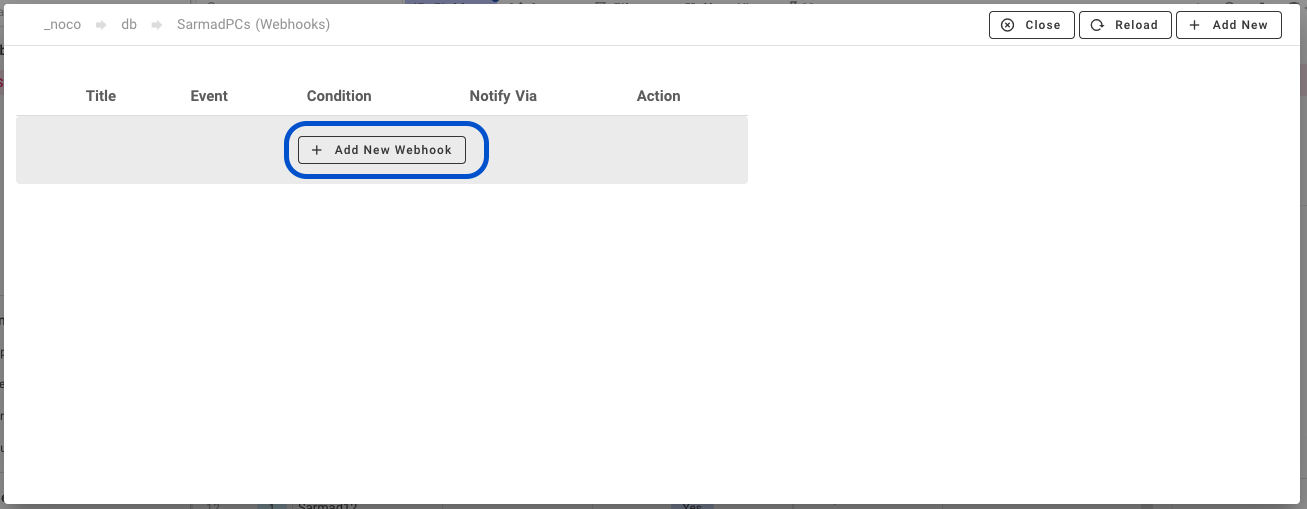
- Click 'More' > 'Webhooks'.
- Click 'Add New Webhook'
- Configure
- Title: Name of your choice to identify this Webhook.
- Event: Trigger event. Choose between.
- After Insert: Trigger event for new ROW insertion.
- After Update: Trigger event for existing ROW updation.
- After Delete: Trigger event for ROW deletion
- On Condition: [Optional] Enable if you wish to associate additional condition/constraint with the trigger configured above.
- Notification: Select 'Microsoft Teams'.
- Select Teams Channels: Select from the drop down list, channel name configured in Step (2). Please click on 'Reload' if drop down list is empty.
- Body: Message to be posted over Teams channel, via webhooks on trigger of configured event.
- Body can contain plain text &
- Handlebars {{ }}