---
title: 'Team & Auth'
description: 'Breakdown of roles & permissions for team user management'
---
## Accessing Team & Auth
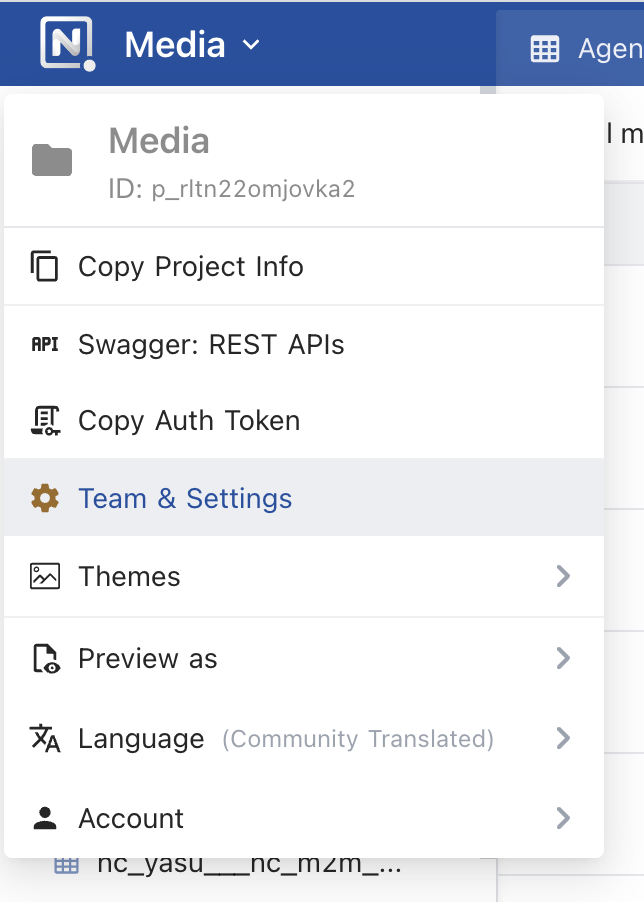
- Click on `Team & Settings` from the `Project Menu`
- Access `Team & Auth` under `Settings`
 ## User Management
### How to Add a User
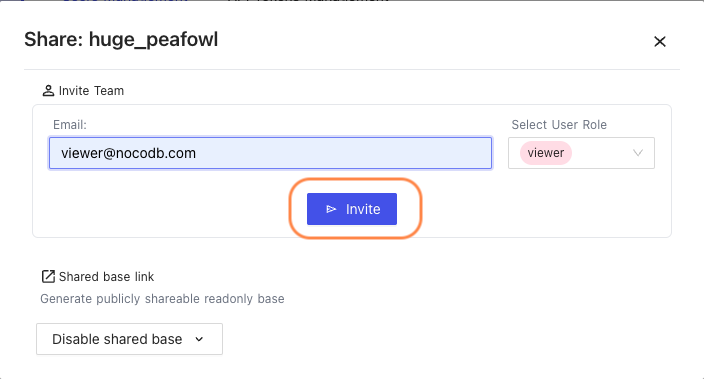
1. Go to `Team & Auth`, click on `Invite Team`

2. Enter the user's `E-mail`. Select `User Role`, and Click `Invite`.
:::tip
You can add multiple comma (,) seperated emails
:::
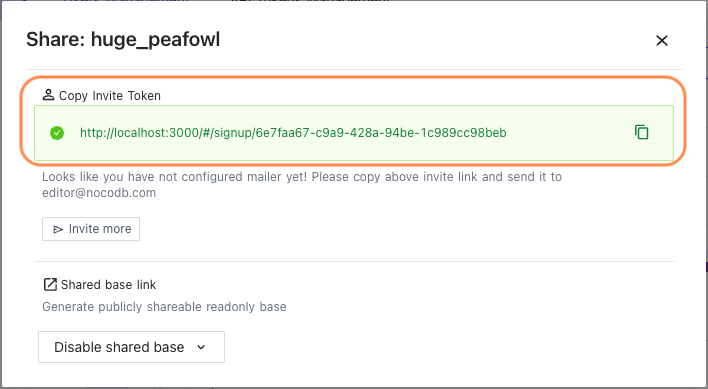
If you do not have an SMTP sender configured, make sure to copy the invite link and manually send it to your collaborator.
### How to Update user permissions
1. Use `Edit` {"<"}1{">"} menu to assign a different role to existing user
2. Use `Delete` {"<"}2{">"} menu to remove a user from accessing current project

------
### User Role Permissions
### Advanced Options & Configurations
| | Owner | Creator | Editor | Commenter | Viewer |
| :-- | :-: | :-: | :-: | :-: | :-: |
| Audit | ✅ | ✅ | ❌ | ❌ | ❌ |
| App Store | ✅ | ❌ | ❌ | ❌ | ❌ |
| Team & Auth | ✅ | ❌ | ❌ | ❌ | ❌ |
| Project Metadata | ✅ | ❌ | ❌ | ❌ | ❌ |
| New user: Add Owner | ✅ | ❌ | ❌ | ❌ | ❌ |
| New user: Add Creator | ✅ | ❌ | ❌ | ❌ | ❌ |
| New user: Add Editor | ✅ | ✅ | ❌ | ❌ | ❌ |
| New user: Add Commenter | ✅ | ✅ | ❌ | ❌ | ❌ |
| New user: Add Viewer | ✅ | ✅ | ❌ | ❌ | ❌ |
| View existing users | ✅ | ✅ | ❌ | ❌ | ❌ |
| Preview mode | ✅ | ✅ | ❌ | ❌ | ❌ |
### Schema Options
| | Owner | Creator | Editor | Commenter | Viewer |
| :-- | :-: | :-: | :-: | :-: | :-: |
| Add table | ✅ | ✅ | ❌ | ❌ | ❌ |
| Delete table | ✅ | ✅ | ❌ | ❌ | ❌ |
| Modify table | ✅ | ✅ | ❌ | ❌ | ❌ |
| Add column | ✅ | ✅ | ❌ | ❌ | ❌ |
| Delete column | ✅ | ✅ | ❌ | ❌ | ❌ |
| Modify column | ✅ | ✅ | ❌ | ❌ | ❌ |
### Record Options
| | Owner | Creator | Editor | Commenter | Viewer |
| :-- | :-: | :-: | :-: | :-: | :-: |
| Add row | ✅ | ✅ | ✅ | ❌ | ❌ |
| Delete row | ✅ | ✅ | ✅ | ❌ | ❌ |
| Modify row/ cell | ✅ | ✅ | ✅ | ❌ | ❌ |
| Expand row | ✅ | ✅ | ✅ | ❌ | ❌ |
| Right click on cell (add/edit row) | ✅ | ✅ | ✅ | ❌ | ❌ |
| View table data (cell) contents | ✅ | ✅ | ✅ | ✅ | ✅ |
### Comments
| | Owner | Creator | Editor | Commenter | Viewer |
| :-- | :-: | :-: | :-: | :-: | :-: |
| View comments from others | ✅ | ✅ | ✅ | ✅ | ❌ |
| Add comments | ✅ | ✅ | ✅ | ✅ | ❌ |
### Views
| | Owner | Creator | Editor | Commenter | Viewer |
| :-- | :-: | :-: | :-: | :-: | :-: |
| Create new view | ✅ | ✅ | ❌ | ❌ | ❌ |
| Share view | ✅ | ✅ | ❌ | ❌ | ❌ |
### Project Generals
| | Owner | Creator | Editor | Commenter | Viewer |
| :-- | :-: | :-: | :-: | :-: | :-: |
| Created views access | ✅ | ✅ | ✅ | ✅ | ✅ |
| Filter fields/ Column | ✅ | ✅ | ✅ | ✅ | ✅ |
| Filter fields/ Query | ✅ | ✅ | ✅ | ✅ | ✅ |
| Sort fields | ✅ | ✅ | ✅ | ✅ | ✅ |
| Theme | ✅ | ✅ | ✅ | ✅ | ✅ |
| Auth token | ✅ | ✅ | ✅ | ✅ | ✅ |
| Project Info | ✅ | ✅ | ✅ | ✅ | ✅ |
| Swagger API | ✅ | ✅ | ✅ | ✅ | ✅ |
## API Tokens Management
NocoDB allows creating API tokens which allow it to be integrated seamlessly with 3rd party apps. API Token is a Nano ID with a length of 40. If you are passing API Token, make sure that the header is called `xc-token`.
- Open `Project Menu`, click on `Team & Settings`
- Click `API Tokens Management` tab under `Team & Auth` section
- Click Add New Token

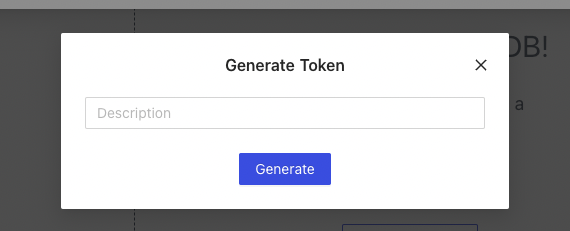
- Type an recognizable name for your token and click `Generate`
- Copy API token to your clipboard; use action menu to the right of token list
## User Management
### How to Add a User
1. Go to `Team & Auth`, click on `Invite Team`

2. Enter the user's `E-mail`. Select `User Role`, and Click `Invite`.
:::tip
You can add multiple comma (,) seperated emails
:::

If you do not have an SMTP sender configured, make sure to copy the invite link and manually send it to your collaborator.

### How to Update user permissions
1. Use `Edit` {"<"}1{">"} menu to assign a different role to existing user
2. Use `Delete` {"<"}2{">"} menu to remove a user from accessing current project

------
### User Role Permissions
### Advanced Options & Configurations
| | Owner | Creator | Editor | Commenter | Viewer |
| :-- | :-: | :-: | :-: | :-: | :-: |
| Audit | ✅ | ✅ | ❌ | ❌ | ❌ |
| App Store | ✅ | ❌ | ❌ | ❌ | ❌ |
| Team & Auth | ✅ | ❌ | ❌ | ❌ | ❌ |
| Project Metadata | ✅ | ❌ | ❌ | ❌ | ❌ |
| New user: Add Owner | ✅ | ❌ | ❌ | ❌ | ❌ |
| New user: Add Creator | ✅ | ❌ | ❌ | ❌ | ❌ |
| New user: Add Editor | ✅ | ✅ | ❌ | ❌ | ❌ |
| New user: Add Commenter | ✅ | ✅ | ❌ | ❌ | ❌ |
| New user: Add Viewer | ✅ | ✅ | ❌ | ❌ | ❌ |
| View existing users | ✅ | ✅ | ❌ | ❌ | ❌ |
| Preview mode | ✅ | ✅ | ❌ | ❌ | ❌ |
### Schema Options
| | Owner | Creator | Editor | Commenter | Viewer |
| :-- | :-: | :-: | :-: | :-: | :-: |
| Add table | ✅ | ✅ | ❌ | ❌ | ❌ |
| Delete table | ✅ | ✅ | ❌ | ❌ | ❌ |
| Modify table | ✅ | ✅ | ❌ | ❌ | ❌ |
| Add column | ✅ | ✅ | ❌ | ❌ | ❌ |
| Delete column | ✅ | ✅ | ❌ | ❌ | ❌ |
| Modify column | ✅ | ✅ | ❌ | ❌ | ❌ |
### Record Options
| | Owner | Creator | Editor | Commenter | Viewer |
| :-- | :-: | :-: | :-: | :-: | :-: |
| Add row | ✅ | ✅ | ✅ | ❌ | ❌ |
| Delete row | ✅ | ✅ | ✅ | ❌ | ❌ |
| Modify row/ cell | ✅ | ✅ | ✅ | ❌ | ❌ |
| Expand row | ✅ | ✅ | ✅ | ❌ | ❌ |
| Right click on cell (add/edit row) | ✅ | ✅ | ✅ | ❌ | ❌ |
| View table data (cell) contents | ✅ | ✅ | ✅ | ✅ | ✅ |
### Comments
| | Owner | Creator | Editor | Commenter | Viewer |
| :-- | :-: | :-: | :-: | :-: | :-: |
| View comments from others | ✅ | ✅ | ✅ | ✅ | ❌ |
| Add comments | ✅ | ✅ | ✅ | ✅ | ❌ |
### Views
| | Owner | Creator | Editor | Commenter | Viewer |
| :-- | :-: | :-: | :-: | :-: | :-: |
| Create new view | ✅ | ✅ | ❌ | ❌ | ❌ |
| Share view | ✅ | ✅ | ❌ | ❌ | ❌ |
### Project Generals
| | Owner | Creator | Editor | Commenter | Viewer |
| :-- | :-: | :-: | :-: | :-: | :-: |
| Created views access | ✅ | ✅ | ✅ | ✅ | ✅ |
| Filter fields/ Column | ✅ | ✅ | ✅ | ✅ | ✅ |
| Filter fields/ Query | ✅ | ✅ | ✅ | ✅ | ✅ |
| Sort fields | ✅ | ✅ | ✅ | ✅ | ✅ |
| Theme | ✅ | ✅ | ✅ | ✅ | ✅ |
| Auth token | ✅ | ✅ | ✅ | ✅ | ✅ |
| Project Info | ✅ | ✅ | ✅ | ✅ | ✅ |
| Swagger API | ✅ | ✅ | ✅ | ✅ | ✅ |
## API Tokens Management
NocoDB allows creating API tokens which allow it to be integrated seamlessly with 3rd party apps. API Token is a Nano ID with a length of 40. If you are passing API Token, make sure that the header is called `xc-token`.
- Open `Project Menu`, click on `Team & Settings`
- Click `API Tokens Management` tab under `Team & Auth` section
- Click Add New Token

- Type an recognizable name for your token and click `Generate`

- Copy API token to your clipboard; use action menu to the right of token list