---
title: "Webhooks"
description: "Webhooks allows user to trigger on certain operations on following database operations"
---
## Overview
Some types of notifications can be triggered by a webhook after a particular event.
### Open `View menu`, click on `Webhooks`
 ### Click `Add New Webhook`
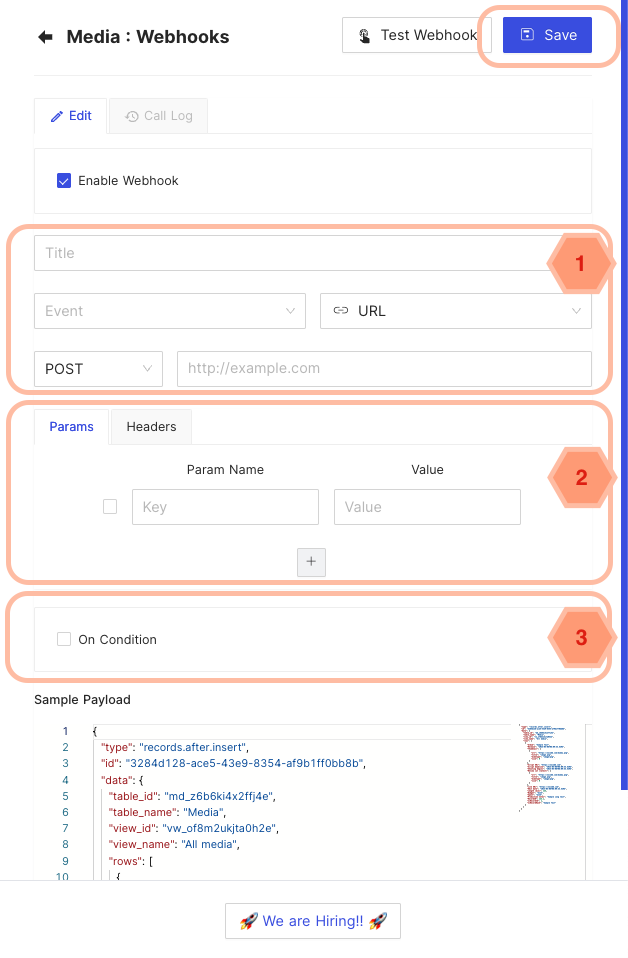
 ### Configure Webhook
- General configurations
- Webhook Name
- Webhook Trigger
- Webhook Type
- Webhook Type specific configuration : additional configuration details depending on webhook type selected
- Webhook Conditional Trigger
- Only records meeting the criteria will trigger webhook
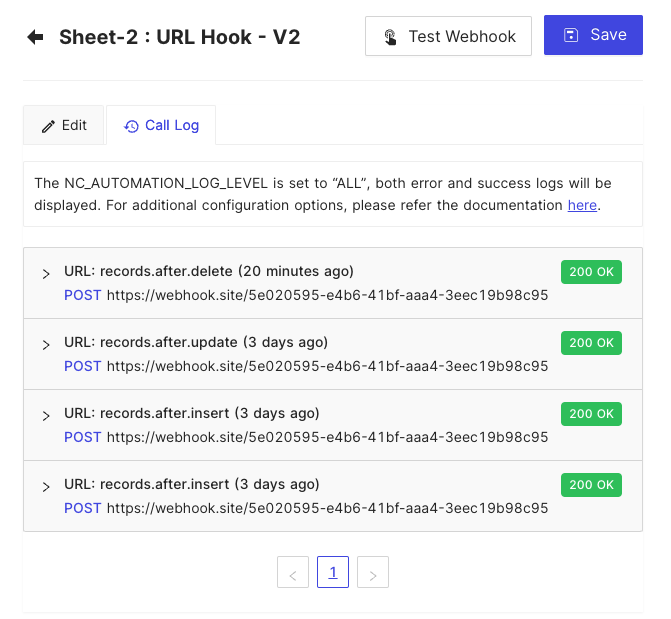
## Call Log
Call Log allows user to check the call history of the hook. By default, it has been disabled. However, it can be configured by using environment variable `NC_AUTOMATION_LOG_LEVEL`.
- `NC_AUTOMATION_LOG_LEVEL=OFF`: No logs will be displayed and no history will be inserted to meta database.
- `NC_AUTOMATION_LOG_LEVEL=ERROR`: only error logs will be displayed and history of error logs will be inserted to meta database.
- `NC_AUTOMATION_LOG_LEVEL=ALL`: Both error and success logs will be displayed and history of both types of logs will be inserted to meta database. **This option is only available for Enterprise Edition.**
## Triggers
Webhooks allows user to trigger on certain operations on following database operations
- AFTER INSERT
- AFTER UPDATE
- AFTER DELETE
The triggers will trigger asynchronously without blocking the actual operation.
### Applications/services
| Trigger | Details |
| --------------- | ---------------------------------------------- |
| Email | Send email to certain email addresses |
| Slack | Notify via Slack channel |
| Microsoft Teams | Notify via Microsoft Teams channel |
| Discord | Notify via Discord channel |
| Mattermost | Notify via Mattermost channel |
| Twilio | Send SMS to certain mobile numbers |
| Whatsapp Twilio | Send Whatsapp messages to numbers using Twilio |
| URL | Invoke an HTTP API |
## Accessing Data: Handlebars
:::caution
You can access data using handlebars for v1 webhooks only.
:::
The current row data and other details will be available in the hooks payload so the user can use [handlebar syntax](https://handlebarsjs.com/guide/#simple-expressions) to use data.
> We are using [Handlebars](https://handlebarsjs.com/) library to parse the payload internally.
### Example
For a table with column names (id, title, created_at, updated_at).
For INSERT/ UPDATE based triggers, use following handlebars to access corresponding **data** fields.
- `{{ **data**.id }}`
- `{{ **data**.title }}`
- `{{ **data**.created_at }}`
- `{{ **data**.updated_at }}`
Note that, for Update trigger - all the fields in the ROW will be accessible, not just the field updated.
For DELETE based triggers, **only** `{{ data.id }}` is accessible representing ID of the column deleted.
### JSON format
Use `{{ json data }}` to dump complete data & user information available in JSON format
### Additional references:
[Handlebar Guide](https://handlebarsjs.com/guide/).
# Application Guide
## Discord
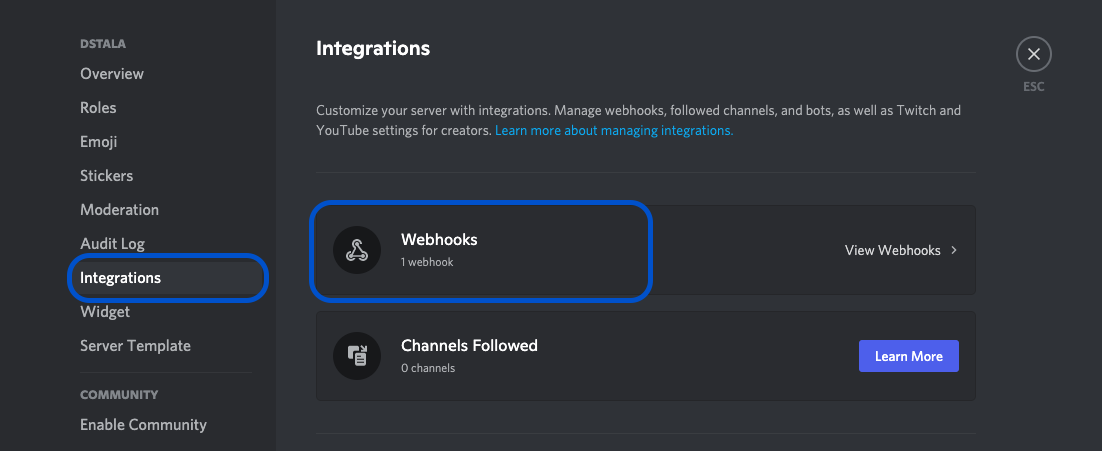
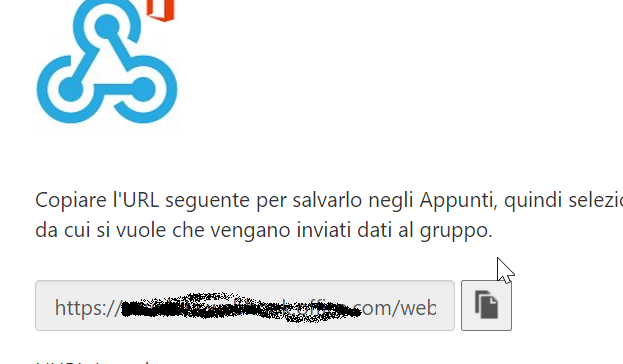
### 1. Create WebHook
- On Discord, open your Server Settings and head into the Integrations tab:
- Click the "Create Webhook" button to create a new webhook!
- Choose channel to which this webhook will post to.
- Copy webhook URL
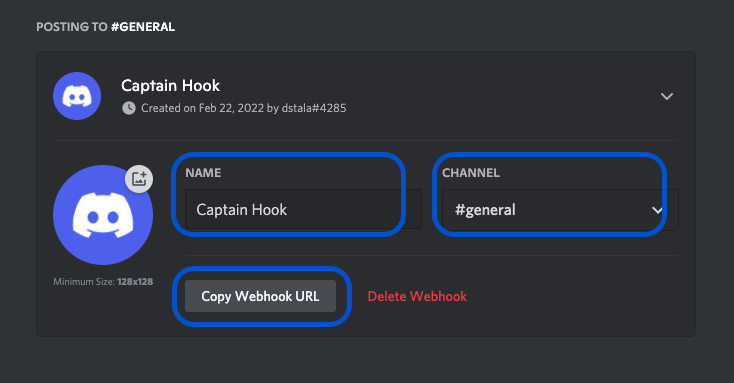
(Sample webhook URL: https://discord.com/api/webhooks/945558283756908644/GNUtiGuzfOky6wZ4ce30XuXc1sbPK3Od7EC-4t6hihh5Fovv6oU9OsdT6mGuoL1QlTzj).
Detailed procedure for discord webhook described [here](https://support.discord.com/hc/en-us/articles/228383668-Intro-to-Webhooks).
### 2. Install Plugin
- Open 'App Store' (under Settings), hover over Discord tile. Click 'Install'.
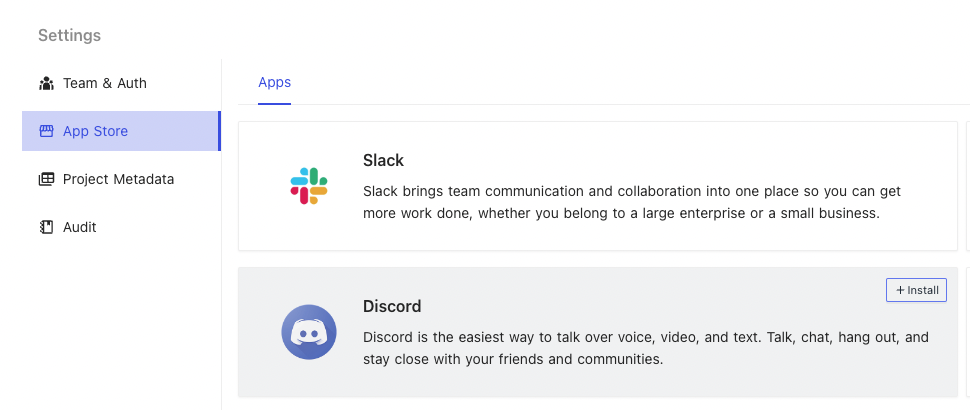
- Provide a name of your choice (not to be confused with Discord Channel name).
- Paste Discord Webhook URL copied from Step (1.) above.
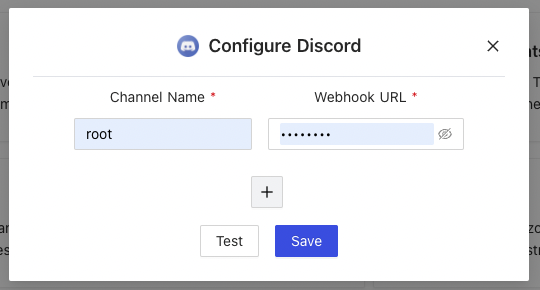
### 3. Configure
- Open project and choose a table.
- Click 'More' > 'Webhooks'.
- Click 'Create webhook'
- Configure webhook
- **Title**: Name of your choice to identify this Webhook.
- **Event**: Trigger event. Choose between.
- After Insert: Trigger event for new ROW insertion.
- After Update: Trigger event for existing ROW updation.
- After Delete: Trigger event for ROW deletion
- **On Condition**: [Optional] Enable if you wish to associate additional condition/constraint with the trigger configured above.
- **Notification**: Select 'Discord'.
- **Select Discord Channels**: Select from the drop down list, channel name configured in Step (2). Please click on 'Reload' if drop down list is empty.
- **Body**: Message to be posted over Discord channel, via webhooks on trigger of configured event.
- Body can contain plain text &
- Handlebars `{{ }}`
## Slack
### 1. Create WebHook
- Details to create slack webhook are captured [here](https://api.slack.com/messaging/webhooks)
### 2. Install Plugin
- Procedure remain same as listed for DISCORD channel configuration above
### 3. Configure Webhook
- Procedure remain same as listed for DISCORD channel configuration above
## Microsoft Teams
### 1. Create WebHook
- On Teams, open your channel, click on three-dots menu (far right) and select 'Connectors'
### Configure Webhook
- General configurations
- Webhook Name
- Webhook Trigger
- Webhook Type
- Webhook Type specific configuration : additional configuration details depending on webhook type selected
- Webhook Conditional Trigger
- Only records meeting the criteria will trigger webhook

## Call Log
Call Log allows user to check the call history of the hook. By default, it has been disabled. However, it can be configured by using environment variable `NC_AUTOMATION_LOG_LEVEL`.
- `NC_AUTOMATION_LOG_LEVEL=OFF`: No logs will be displayed and no history will be inserted to meta database.
- `NC_AUTOMATION_LOG_LEVEL=ERROR`: only error logs will be displayed and history of error logs will be inserted to meta database.
- `NC_AUTOMATION_LOG_LEVEL=ALL`: Both error and success logs will be displayed and history of both types of logs will be inserted to meta database. **This option is only available for Enterprise Edition.**

## Triggers
Webhooks allows user to trigger on certain operations on following database operations
- AFTER INSERT
- AFTER UPDATE
- AFTER DELETE
The triggers will trigger asynchronously without blocking the actual operation.
### Applications/services
| Trigger | Details |
| --------------- | ---------------------------------------------- |
| Email | Send email to certain email addresses |
| Slack | Notify via Slack channel |
| Microsoft Teams | Notify via Microsoft Teams channel |
| Discord | Notify via Discord channel |
| Mattermost | Notify via Mattermost channel |
| Twilio | Send SMS to certain mobile numbers |
| Whatsapp Twilio | Send Whatsapp messages to numbers using Twilio |
| URL | Invoke an HTTP API |
## Accessing Data: Handlebars
:::caution
You can access data using handlebars for v1 webhooks only.
:::
The current row data and other details will be available in the hooks payload so the user can use [handlebar syntax](https://handlebarsjs.com/guide/#simple-expressions) to use data.
> We are using [Handlebars](https://handlebarsjs.com/) library to parse the payload internally.
### Example
For a table with column names (id, title, created_at, updated_at).
For INSERT/ UPDATE based triggers, use following handlebars to access corresponding **data** fields.
- `{{ **data**.id }}`
- `{{ **data**.title }}`
- `{{ **data**.created_at }}`
- `{{ **data**.updated_at }}`
Note that, for Update trigger - all the fields in the ROW will be accessible, not just the field updated.
For DELETE based triggers, **only** `{{ data.id }}` is accessible representing ID of the column deleted.
### JSON format
Use `{{ json data }}` to dump complete data & user information available in JSON format
### Additional references:
[Handlebar Guide](https://handlebarsjs.com/guide/).
# Application Guide
## Discord
### 1. Create WebHook
- On Discord, open your Server Settings and head into the Integrations tab:
- Click the "Create Webhook" button to create a new webhook!

- Choose channel to which this webhook will post to.
- Copy webhook URL

(Sample webhook URL: https://discord.com/api/webhooks/945558283756908644/GNUtiGuzfOky6wZ4ce30XuXc1sbPK3Od7EC-4t6hihh5Fovv6oU9OsdT6mGuoL1QlTzj).
Detailed procedure for discord webhook described [here](https://support.discord.com/hc/en-us/articles/228383668-Intro-to-Webhooks).
### 2. Install Plugin
- Open 'App Store' (under Settings), hover over Discord tile. Click 'Install'.

- Provide a name of your choice (not to be confused with Discord Channel name).
- Paste Discord Webhook URL copied from Step (1.) above.

### 3. Configure
- Open project and choose a table.
- Click 'More' > 'Webhooks'.
- Click 'Create webhook'
- Configure webhook
- **Title**: Name of your choice to identify this Webhook.
- **Event**: Trigger event. Choose between.
- After Insert: Trigger event for new ROW insertion.
- After Update: Trigger event for existing ROW updation.
- After Delete: Trigger event for ROW deletion
- **On Condition**: [Optional] Enable if you wish to associate additional condition/constraint with the trigger configured above.
- **Notification**: Select 'Discord'.
- **Select Discord Channels**: Select from the drop down list, channel name configured in Step (2). Please click on 'Reload' if drop down list is empty.
- **Body**: Message to be posted over Discord channel, via webhooks on trigger of configured event.
- Body can contain plain text &
- Handlebars `{{ }}`
## Slack
### 1. Create WebHook
- Details to create slack webhook are captured [here](https://api.slack.com/messaging/webhooks)
### 2. Install Plugin
- Procedure remain same as listed for DISCORD channel configuration above
### 3. Configure Webhook
- Procedure remain same as listed for DISCORD channel configuration above
## Microsoft Teams
### 1. Create WebHook
- On Teams, open your channel, click on three-dots menu (far right) and select 'Connectors'
 - Select incoming webhook & click 'Configure'
 - Create webhook, Copy webhook URL
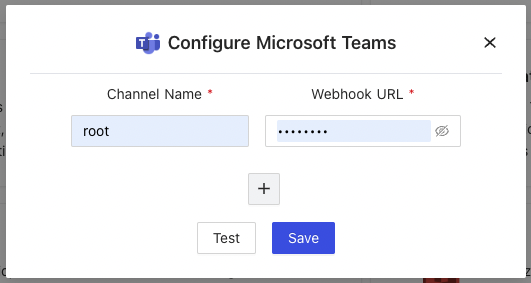
### 2. Install Plugin
- Open 'App Store' (under Settings), hover over 'Microsoft Teams' tile. Click 'Install'.
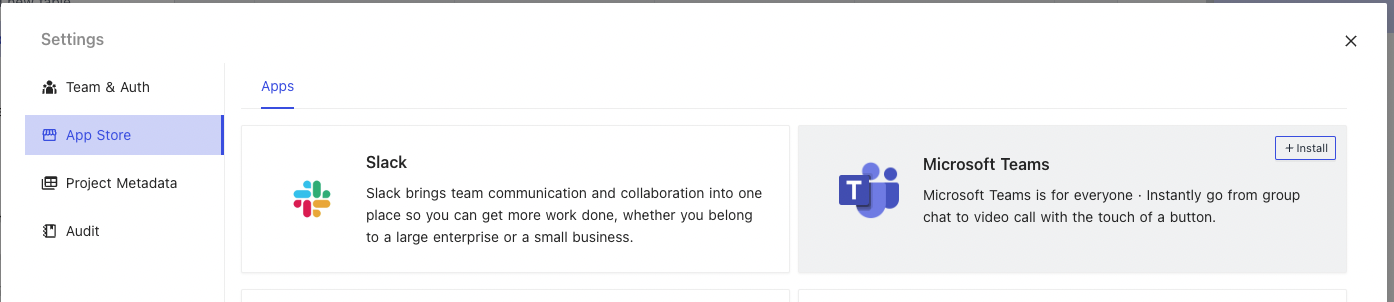
- Provide a name of your choice (not to be confused with Teams Channel name).
- Paste MS Teams Webhook URL copied from Step (1.) above.
### 3. Configure
- Open project and choose a table.
- Click 'More' {">"} 'Webhooks'.
- Click 'Create webhook'
- Configure webhook
- **Title**: Name of your choice to identify this Webhook.
- **Event**: Trigger event. Choose between.
- After Insert: Trigger event for new ROW insertion.
- After Update: Trigger event for existing ROW updation.
- After Delete: Trigger event for ROW deletion
- **On Condition**: [Optional] Enable if you wish to associate additional condition/constraint with the trigger configured above.
- **Notification**: Select 'Microsoft Teams'.
- **Select Teams Channels**: Select from the drop down list, channel name configured in Step (2). Please click on 'Reload' if drop down list is empty.
- **Body**: Message to be posted over Teams channel, via webhooks on trigger of configured event.
- Body can contain plain text &
- Handlebars `{{ }}`
## Webhook V2
Webhook v2 is available after v0.106.0. Here's the differences.
- Response Payload has been predefined and cannot configure in Body using Handlebars. The payload can be referenced under `Sample Payload` in Hook detail page.
- Support the following bulk operations:
- AFTER BULK INSERT
- AFTER BULK UPDATE
- AFTER BULK DELETE
- Create webhook, Copy webhook URL

### 2. Install Plugin
- Open 'App Store' (under Settings), hover over 'Microsoft Teams' tile. Click 'Install'.

- Provide a name of your choice (not to be confused with Teams Channel name).
- Paste MS Teams Webhook URL copied from Step (1.) above.

### 3. Configure
- Open project and choose a table.
- Click 'More' {">"} 'Webhooks'.
- Click 'Create webhook'
- Configure webhook
- **Title**: Name of your choice to identify this Webhook.
- **Event**: Trigger event. Choose between.
- After Insert: Trigger event for new ROW insertion.
- After Update: Trigger event for existing ROW updation.
- After Delete: Trigger event for ROW deletion
- **On Condition**: [Optional] Enable if you wish to associate additional condition/constraint with the trigger configured above.
- **Notification**: Select 'Microsoft Teams'.
- **Select Teams Channels**: Select from the drop down list, channel name configured in Step (2). Please click on 'Reload' if drop down list is empty.
- **Body**: Message to be posted over Teams channel, via webhooks on trigger of configured event.
- Body can contain plain text &
- Handlebars `{{ }}`
## Webhook V2
Webhook v2 is available after v0.106.0. Here's the differences.
- Response Payload has been predefined and cannot configure in Body using Handlebars. The payload can be referenced under `Sample Payload` in Hook detail page.
- Support the following bulk operations:
- AFTER BULK INSERT
- AFTER BULK UPDATE
- AFTER BULK DELETE