---
title: 'Installation'
description: 'Simple installation - takes about three minutes!'
position: 10
category: 'Getting started'
menuTitle: 'Installation'
link: https://codesandbox.io/embed/vigorous-firefly-80kq5?hidenavigation=1&theme=dark
---
Simple installation - takes about three minutes!
## Prerequisites
- [Docker](https://www.docker.com/get-started) or [Node.js](https://nodejs.org/en/download) ( > v14.x )
## Quick try
### Heroku
Before doing so, make sure you have a Heroku account. By default, an add-on Heroku Postgres will be used as meta database. You can see the connection string defined in `DATABASE_URL` by navigating to Heroku App Settings and selecting Config Vars.
 ### Docker
If you are a Docker user, you may try this way!
```bash
docker run -d --name nocodb \
-v "$(pwd)"/nocodb:/usr/app/data/ \
-p 8080:8080 \
nocodb/nocodb:latest
```
```bash
docker run -d --name nocodb-mysql \
-v "$(pwd)"/nocodb:/usr/app/data/ \
-p 8080:8080 \
-e NC_DB="mysql2://host.docker.internal:3306?u=root&p=password&d=d1" \
-e NC_AUTH_JWT_SECRET="569a1821-0a93-45e8-87ab-eb857f20a010" \
nocodb/nocodb:latest
```
```bash
docker run -d --name nocodb-postgres \
-v "$(pwd)"/nocodb:/usr/app/data/ \
-p 8080:8080 \
-e NC_DB="pg://host.docker.internal:5432?u=root&p=password&d=d1" \
-e NC_AUTH_JWT_SECRET="569a1821-0a93-45e8-87ab-eb857f20a010" \
nocodb/nocodb:latest
```
```bash
docker run -d --name nocodb-mssql \
-v "$(pwd)"/nocodb:/usr/app/data/ \
-p 8080:8080 \
-e NC_DB="mssql://host.docker.internal:1433?u=root&p=password&d=d1" \
-e NC_AUTH_JWT_SECRET="569a1821-0a93-45e8-87ab-eb857f20a010" \
nocodb/nocodb:latest
```
Tip 1: To persist data in docker you can mount volume at `/usr/app/data/` since 0.10.6. In older version mount at `/usr/src/app`. Otherwise your data will be lost after recreating the container.
Tip 2: If you plan to input some special characters, you may need to change the character set and collation yourself when creating the database. Please check out the examples for MySQL Docker.
### Docker Compose
We provide different docker-compose.yml files under this directory. Here are some examples.
```bash
git clone https://github.com/nocodb/nocodb
cd nocodb/docker-compose/mysql
docker-compose up -d
```
```bash
git clone https://github.com/nocodb/nocodb
cd nocodb/docker-compose/pg
docker-compose up -d
```
```bash
git clone https://github.com/nocodb/nocodb
cd nocodb/docker-compose/mssql
docker-compose up -d
```
Tip 1: To persist data in docker you can mount volume at `/usr/app/data/` since 0.10.6. In older version mount at `/usr/src/app`.
Tip 2: If you plan to input some special characters, you may need to change the character set and collation yourself when creating the database. Please check out the examples for MySQL Docker Compose.
### NPX
You can run below command if you need an interactive configuration.
```bash
npx create-nocodb-app
```
#### Preview:
### Docker
If you are a Docker user, you may try this way!
```bash
docker run -d --name nocodb \
-v "$(pwd)"/nocodb:/usr/app/data/ \
-p 8080:8080 \
nocodb/nocodb:latest
```
```bash
docker run -d --name nocodb-mysql \
-v "$(pwd)"/nocodb:/usr/app/data/ \
-p 8080:8080 \
-e NC_DB="mysql2://host.docker.internal:3306?u=root&p=password&d=d1" \
-e NC_AUTH_JWT_SECRET="569a1821-0a93-45e8-87ab-eb857f20a010" \
nocodb/nocodb:latest
```
```bash
docker run -d --name nocodb-postgres \
-v "$(pwd)"/nocodb:/usr/app/data/ \
-p 8080:8080 \
-e NC_DB="pg://host.docker.internal:5432?u=root&p=password&d=d1" \
-e NC_AUTH_JWT_SECRET="569a1821-0a93-45e8-87ab-eb857f20a010" \
nocodb/nocodb:latest
```
```bash
docker run -d --name nocodb-mssql \
-v "$(pwd)"/nocodb:/usr/app/data/ \
-p 8080:8080 \
-e NC_DB="mssql://host.docker.internal:1433?u=root&p=password&d=d1" \
-e NC_AUTH_JWT_SECRET="569a1821-0a93-45e8-87ab-eb857f20a010" \
nocodb/nocodb:latest
```
Tip 1: To persist data in docker you can mount volume at `/usr/app/data/` since 0.10.6. In older version mount at `/usr/src/app`. Otherwise your data will be lost after recreating the container.
Tip 2: If you plan to input some special characters, you may need to change the character set and collation yourself when creating the database. Please check out the examples for MySQL Docker.
### Docker Compose
We provide different docker-compose.yml files under this directory. Here are some examples.
```bash
git clone https://github.com/nocodb/nocodb
cd nocodb/docker-compose/mysql
docker-compose up -d
```
```bash
git clone https://github.com/nocodb/nocodb
cd nocodb/docker-compose/pg
docker-compose up -d
```
```bash
git clone https://github.com/nocodb/nocodb
cd nocodb/docker-compose/mssql
docker-compose up -d
```
Tip 1: To persist data in docker you can mount volume at `/usr/app/data/` since 0.10.6. In older version mount at `/usr/src/app`.
Tip 2: If you plan to input some special characters, you may need to change the character set and collation yourself when creating the database. Please check out the examples for MySQL Docker Compose.
### NPX
You can run below command if you need an interactive configuration.
```bash
npx create-nocodb-app
```
#### Preview:
 ### Homebrew
```bash
brew tap nocodb/nocodb
brew install nocodb
nocodb
```
### Executables
You can download executables directly and run without any extra dependancy. Use the right command based on your platform.
##### MacOS (x64)
```bash
curl http://get.nocodb.com/macos-x64 -o nocodb -L \
&& chmod +x nocodb \
&& ./nocodb
```
##### MacOS (arm64)
```bash
curl http://get.nocodb.com/macos-arm64 -o nocodb -L \
&& chmod +x nocodb \
&& ./nocodb
```
##### Linux (x64)
```bash
curl http://get.nocodb.com/linux-x64 -o nocodb -L \
&& chmod +x nocodb \
&& ./nocodb
```
##### Linux (arm64)
```bash
curl http://get.nocodb.com/linux-arm64 -o nocodb -L \
&& chmod +x nocodb \
&& ./nocodb
```
##### Windows (x64)
```bash
iwr http://get.nocodb.com/win-x64.exe
.\Noco-win-x64.exe
```
##### Windows (arm64)
```bash
iwr http://get.nocodb.com/win-arm64.exe
.\Noco-win-arm64.exe
```
### Node Application
We provide a simple NodeJS Application for getting started.
```bash
git clone https://github.com/nocodb/nocodb-seed
cd nocodb-seed
npm install
npm start
```
### AWS ECS (Fargate)
Click to Expand
#### Create ECS Cluster
```
aws ecs create-cluster \
--cluster-name
```
#### Create Log group
```
aws logs create-log-group \
--log-group-name /ecs//
```
#### Create ECS Task Definiton
Every time you create it, it will add a new version. If it is not existing, the version will be 1.
```bash
aws ecs register-task-definition \
--cli-input-json "file://./.json"
```
This json file defines the container specification. You can define secrets such as NC_DB and environment variables here.
Here's the sample Task Definition
```json
{
"family": "nocodb-sample-task-def",
"networkMode": "awsvpc",
"containerDefinitions": [{
"name": "",
"image": "nocodb/nocodb:latest",
"essential": true,
"logConfiguration": {
"logDriver": "awslogs",
"options": {
"awslogs-group": "/ecs//",
"awslogs-region": "",
"awslogs-stream-prefix": "ecs"
}
},
"secrets": [{
"name": "",
"valueFrom": ""
}],
"environment": [{
"name": "",
"value": ""
}],
"portMappings": [{
"containerPort": 8080,
"hostPort": 8080,
"protocol": "tcp"
}]
}],
"requiresCompatibilities": [
"FARGATE"
],
"cpu": "256",
"memory": "512",
"executionRoleArn": "",
"taskRoleArn": ""
}
```
#### Create ECS Service
```bash
aws ecs create-service \
--cluster \
--service-name \
--task-definition : \
--desired-count \
--launch-type "FARGATE" \
--platform-version \
--health-check-grace-period-seconds \
--network-configuration "awsvpcConfiguration={subnets=[""], securityGroups=[""], assignPublicIp=ENABLED}" \
--load-balancer targetGroupArn=,containerName=,containerPort=
```
If your service fails to start, you may check the logs in ECS console or in Cloudwatch. Generally it fails due to the connection between ECS container and NC_DB. Make sure the security groups have the correct inbound and outbound rules.
```
### GCP (Cloud Run)
Click to Expand
#### Pull NocoDB Image on Cloud Shell
Since Cloud Run only supports images from Google Container Registry (GCR) or Artifact Registry, we need to pull NocoDB image, tag it and push it in GCP using Cloud Shell. Here are some sample commands which you can execute in Cloud Shell.
```bash
# pull latest NocoDB image
docker pull nocodb/nocodb:latest
# tag the image
docker tag nocodb/nocodb:latest gcr.io//nocodb/nocodb:latest
# push the image to GCR
docker push gcr.io//nocodb/nocodb:latest
```
#### Deploy NocoDB on Cloud Run
```bash
gcloud run deploy --image=gcr.io//nocodb/nocodb:latest \
--region=us-central1 \
--allow-unauthenticated \
--platform=managed
```
### DigitalOcean (App)
Click to Expand
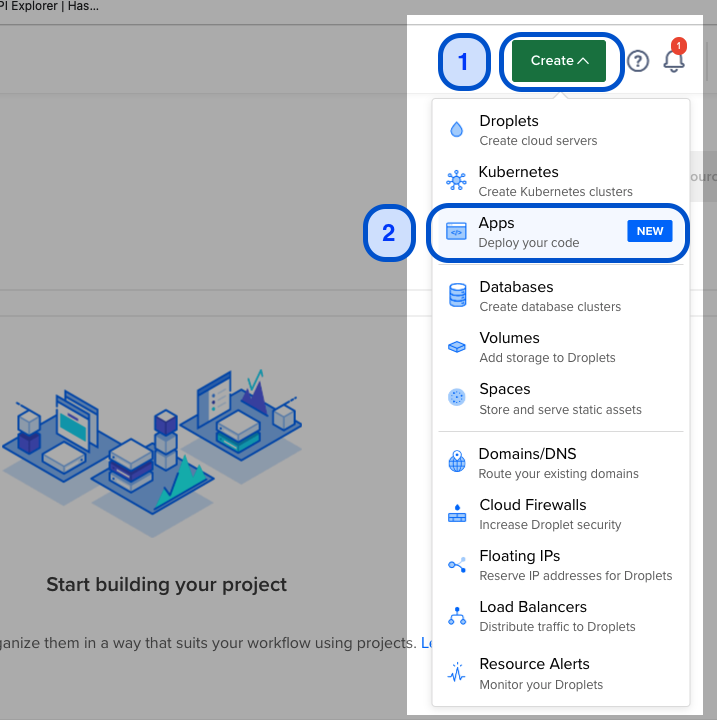
#### Create Apps
On Home page, Click on Create icon & Select Apps (Deploy your code).
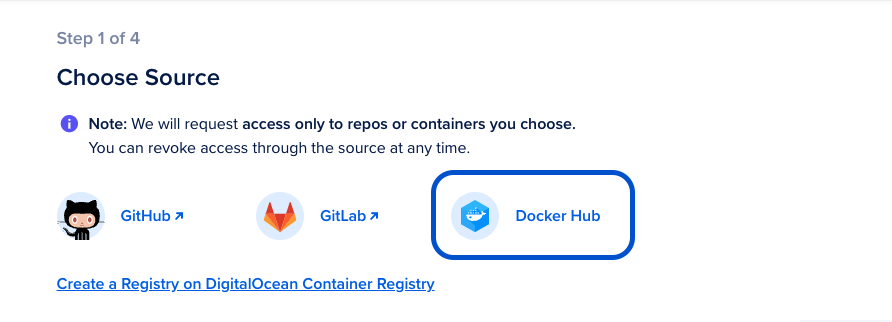
#### Choose Source: Docker Hub
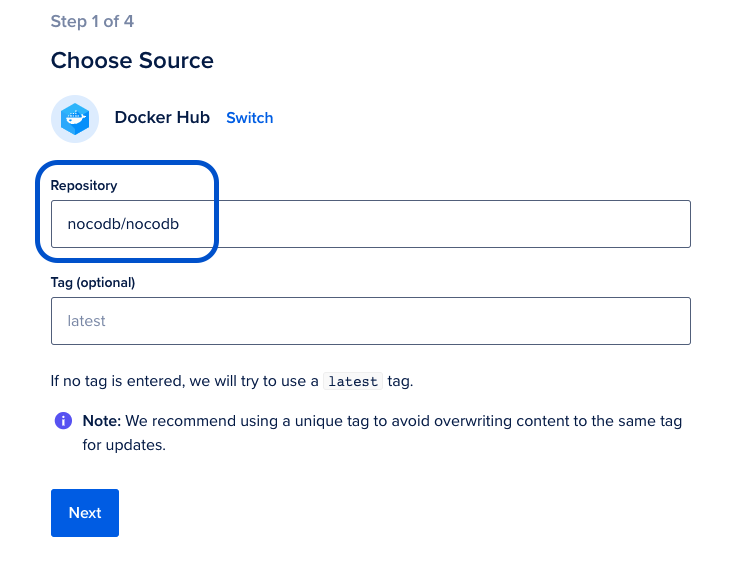
#### Choose Source: Repository
Configure Source Repository as `nocodb/nocodb`. Optionally you can pick release tag if you are interested in specific NocoDB version.
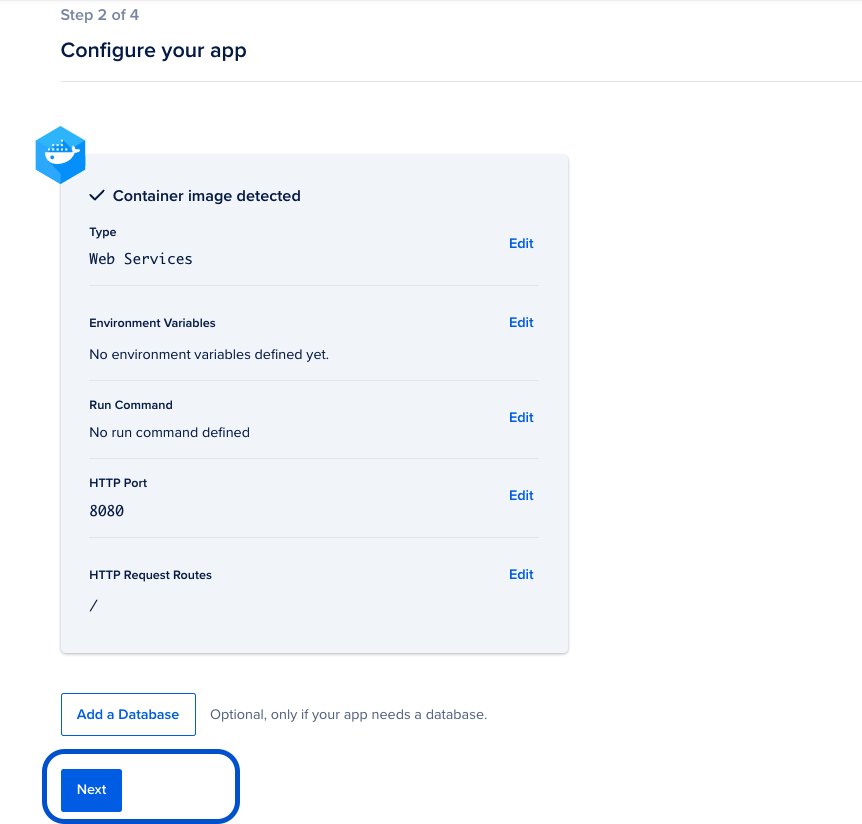
#### [Optional] Additional Configurations
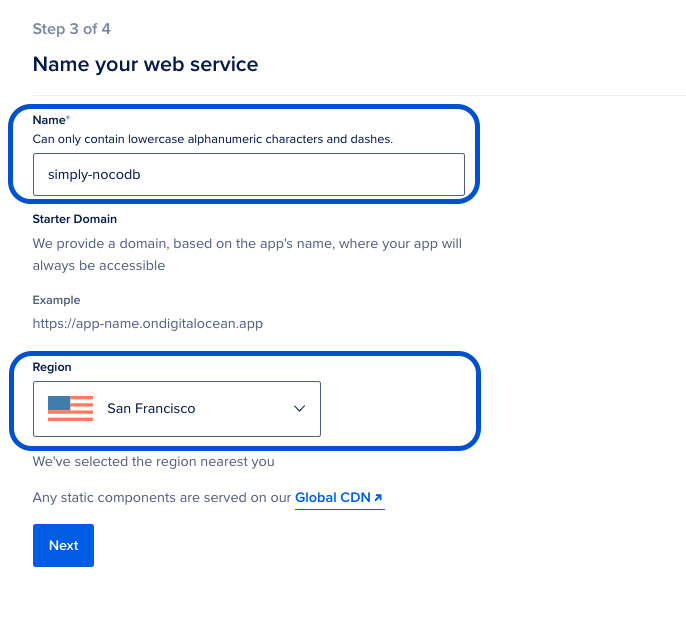
#### Name your web service
Pick a name for your NocoDB application. This name will become part of URL subsequently
Pick nearest Region for cloud hosting
#### Finalize and Launch
- Select hosting plan for your NocoDB application
- Click "Launch APP"
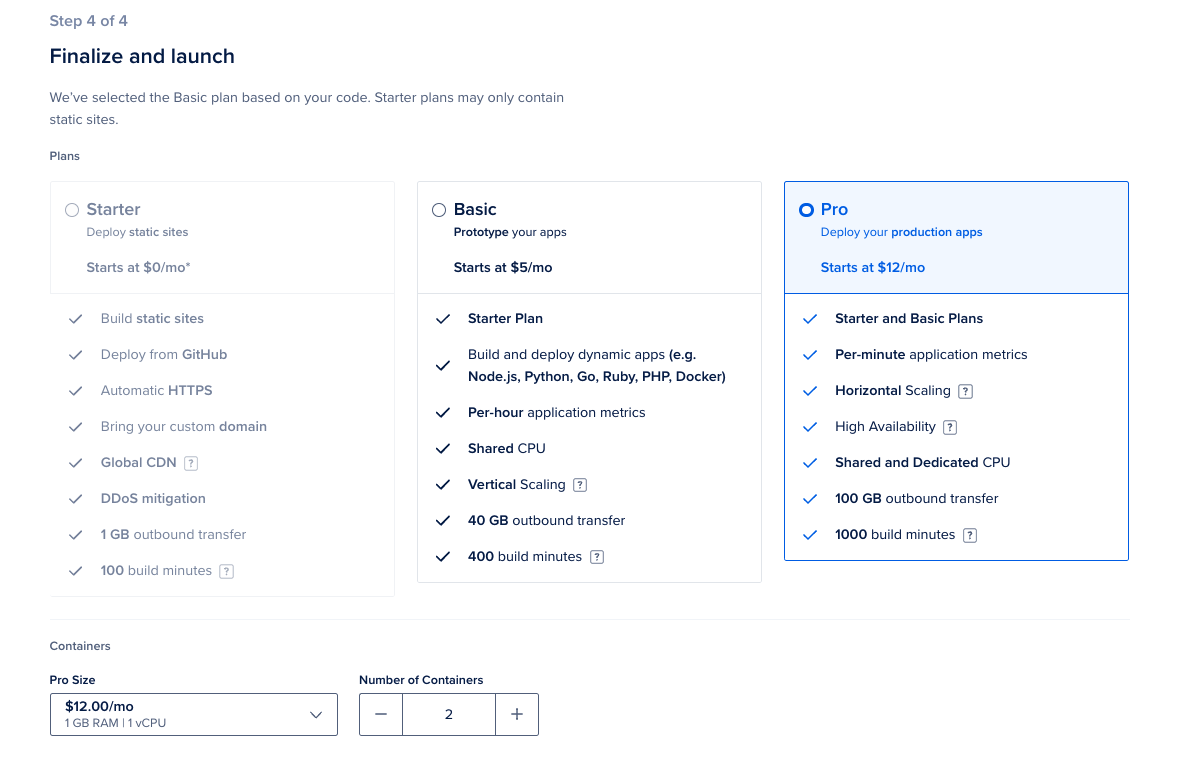
Application will be build & URL will be live in a minute! The URL will be something like https://simply-nocodb-rsyir.ondigitalocean.app/
### Cloudron
Click to Expand
#### Navigate to App Store
Log into Cloudron and select App Store
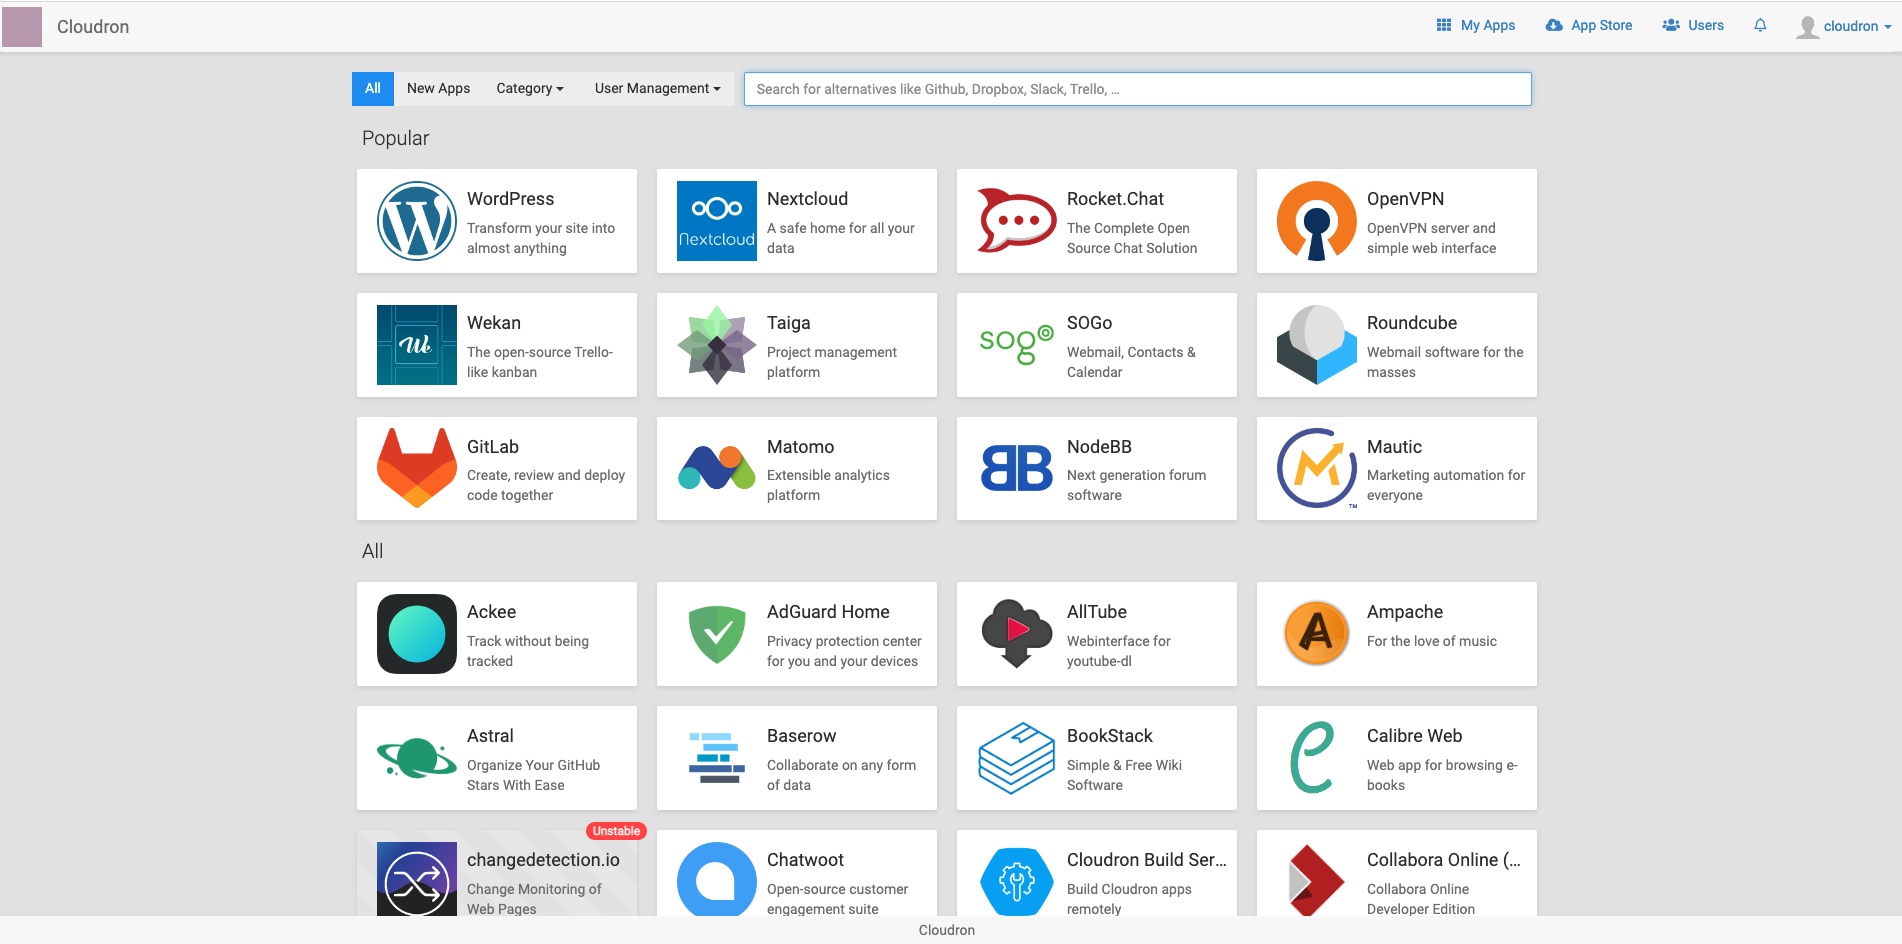
#### Search NocoDB

#### Click Install
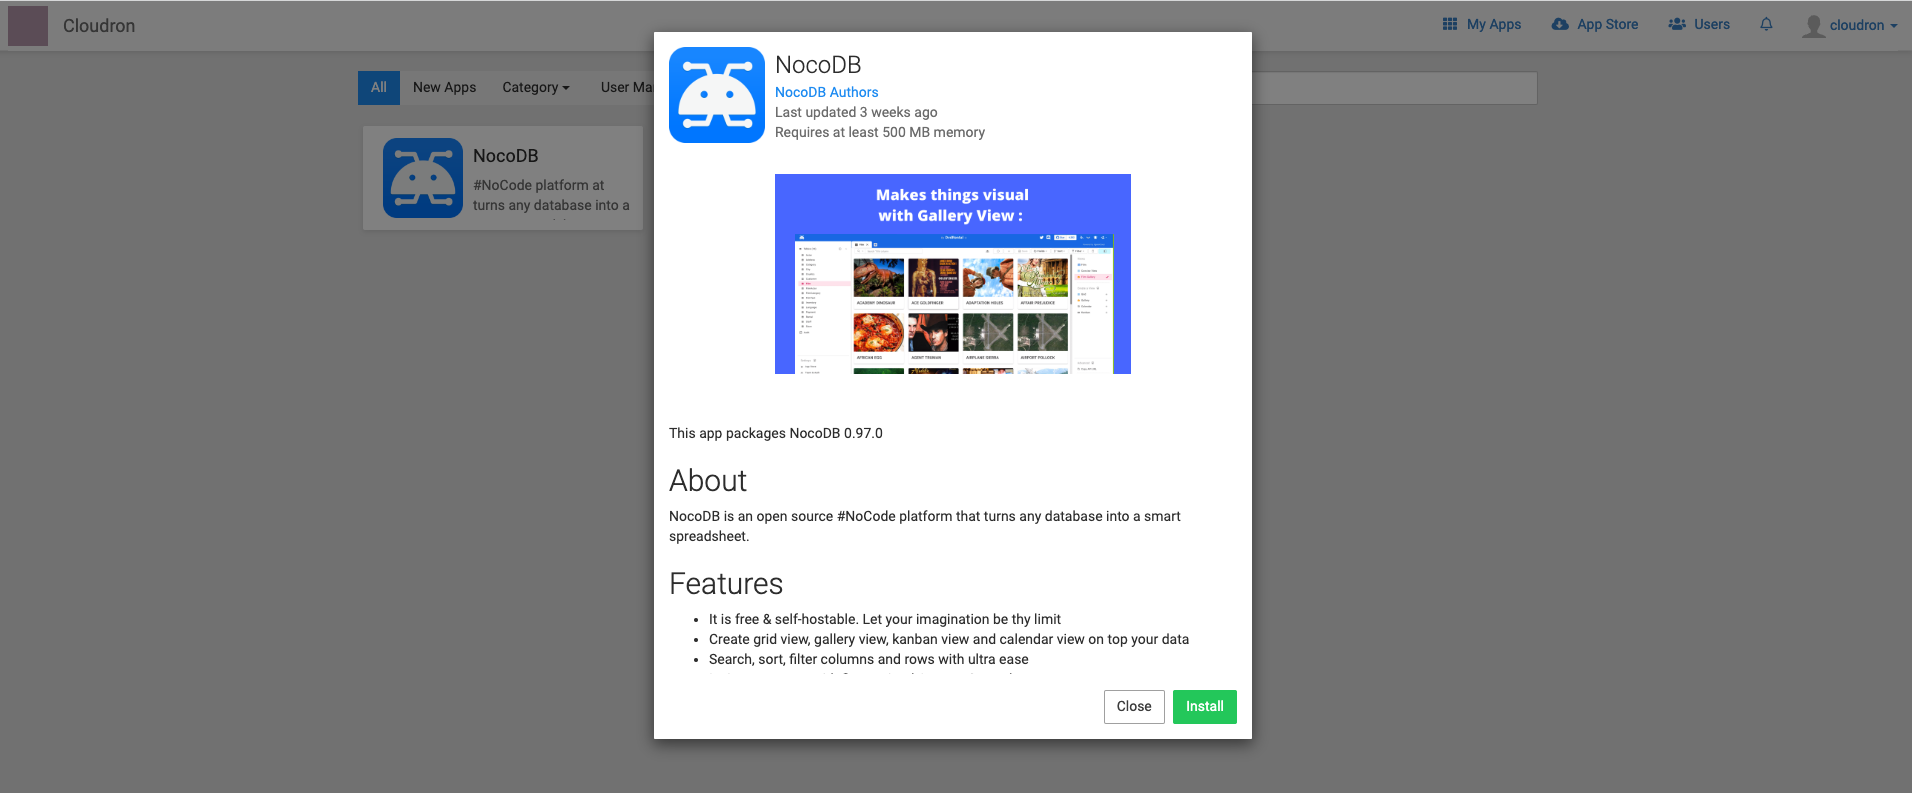
#### Configure NocoDB
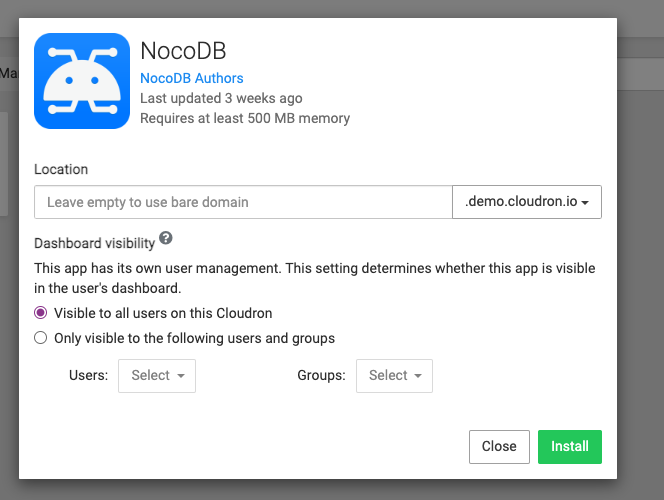
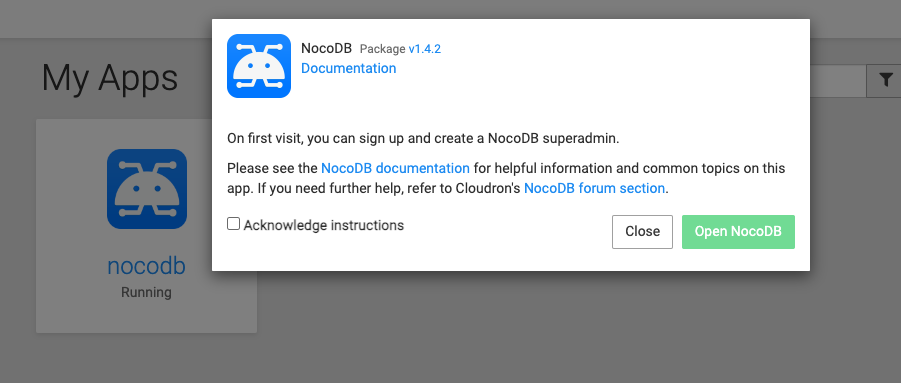
#### Go to My App and Launch NocoDB
### CapRover
Click to Expand
#### Login and Click One-Click Apps / Databases

#### Search NocoDB
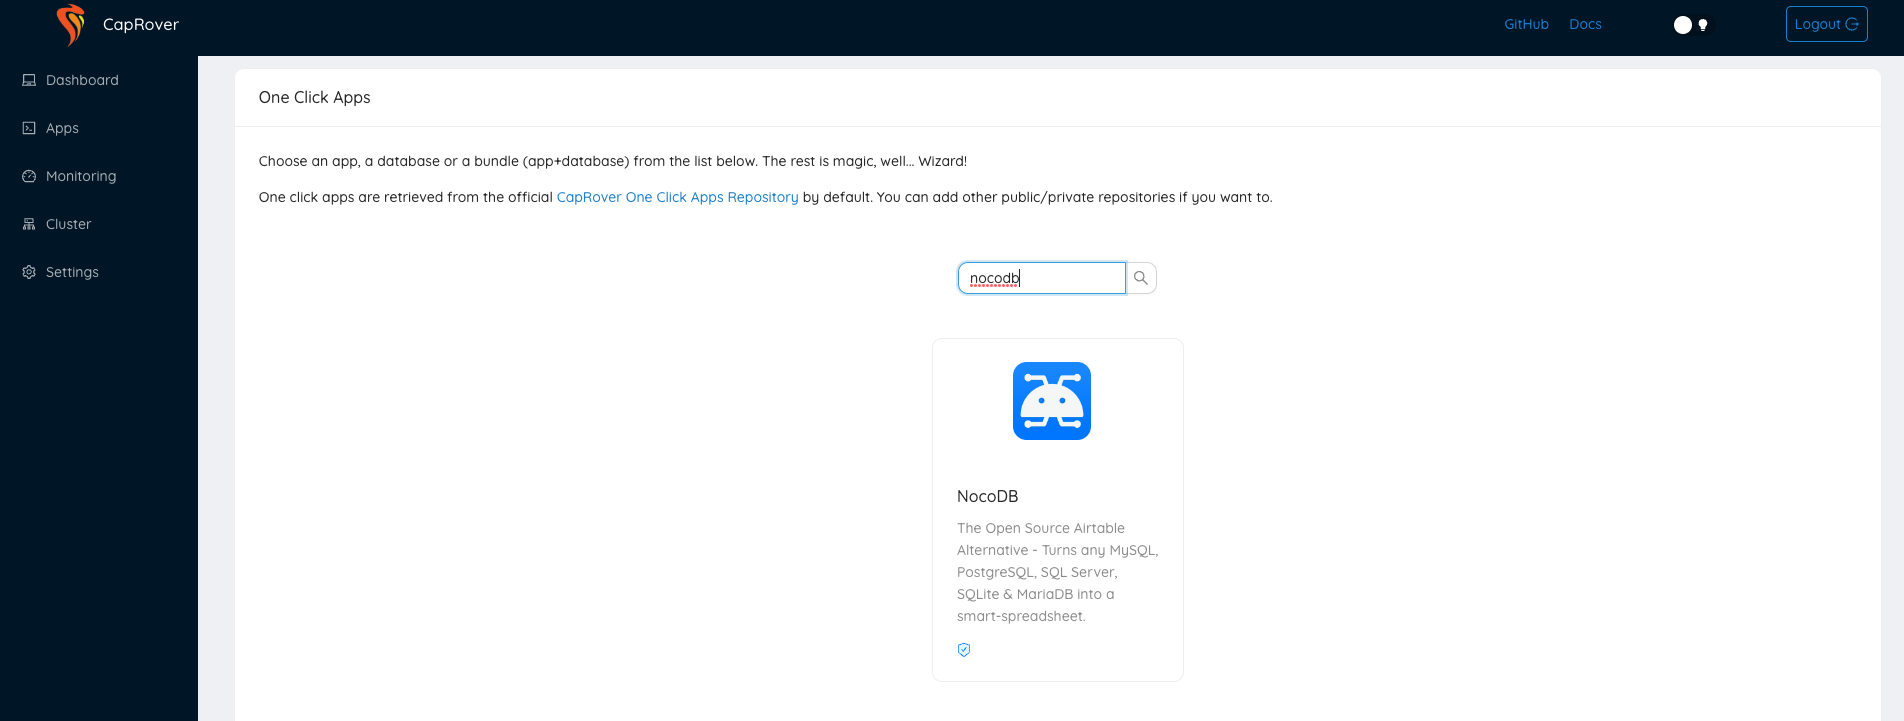
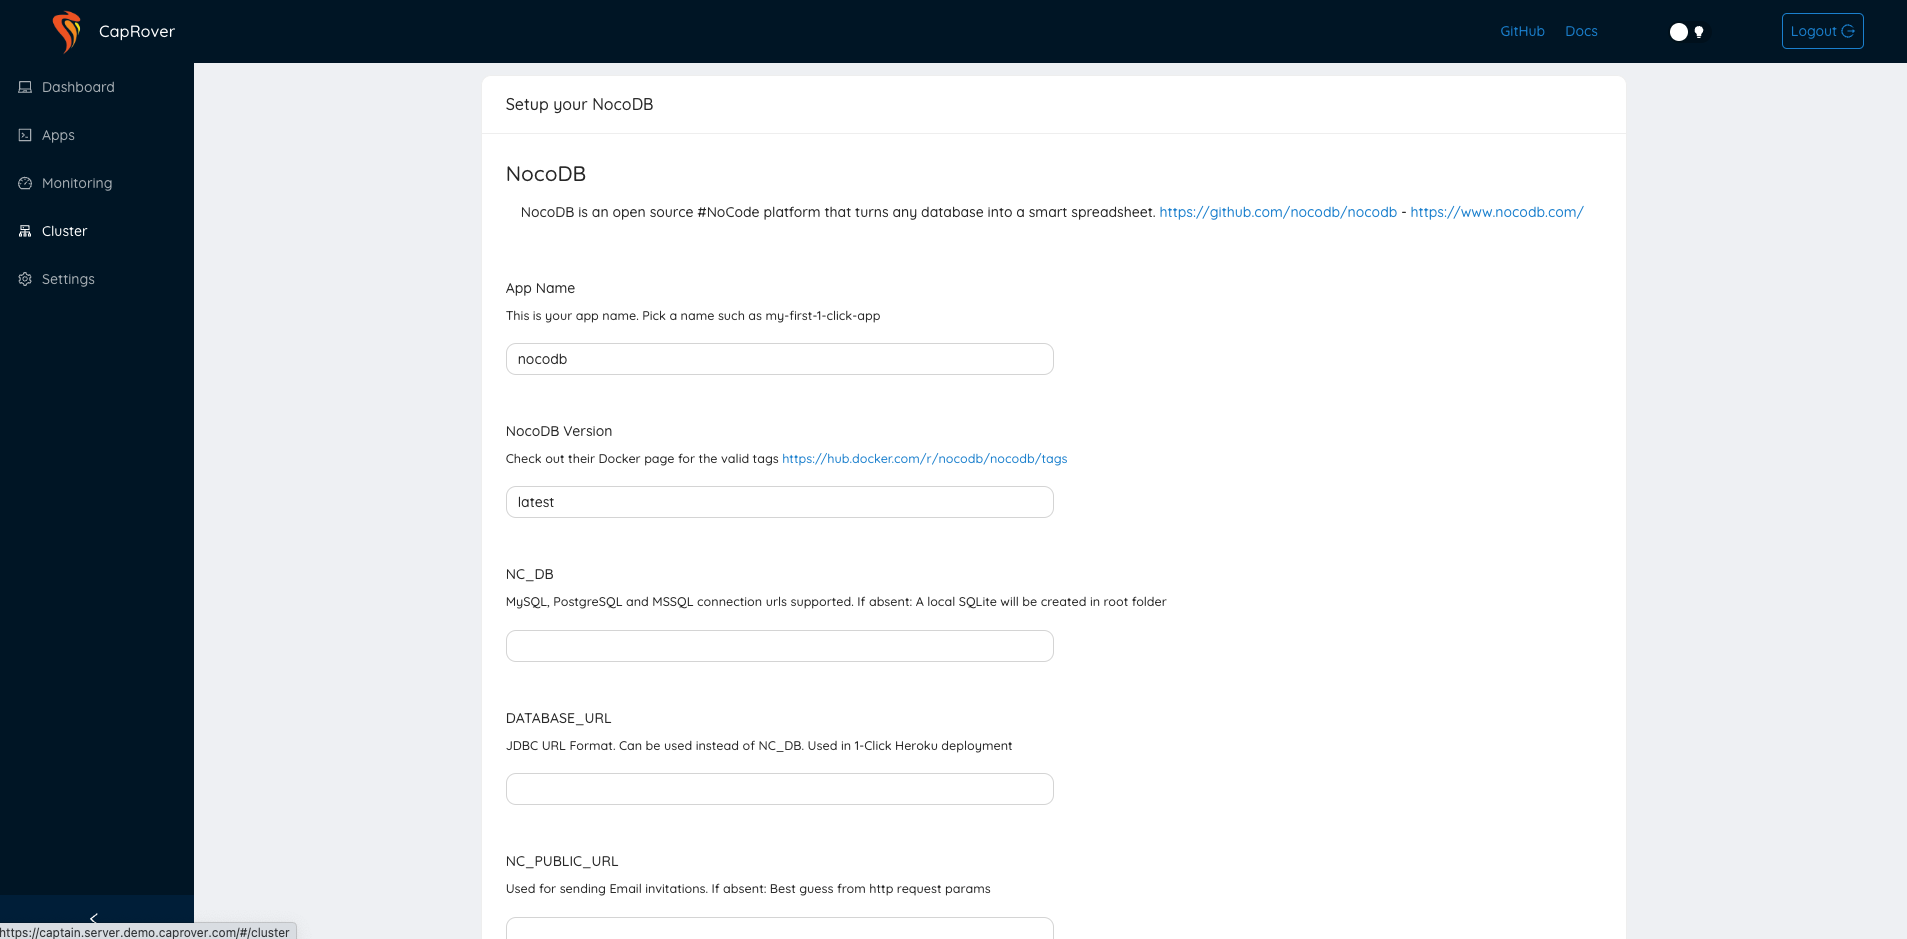
#### Configure NocoDB and Deploy
### Railway
Click to Expand
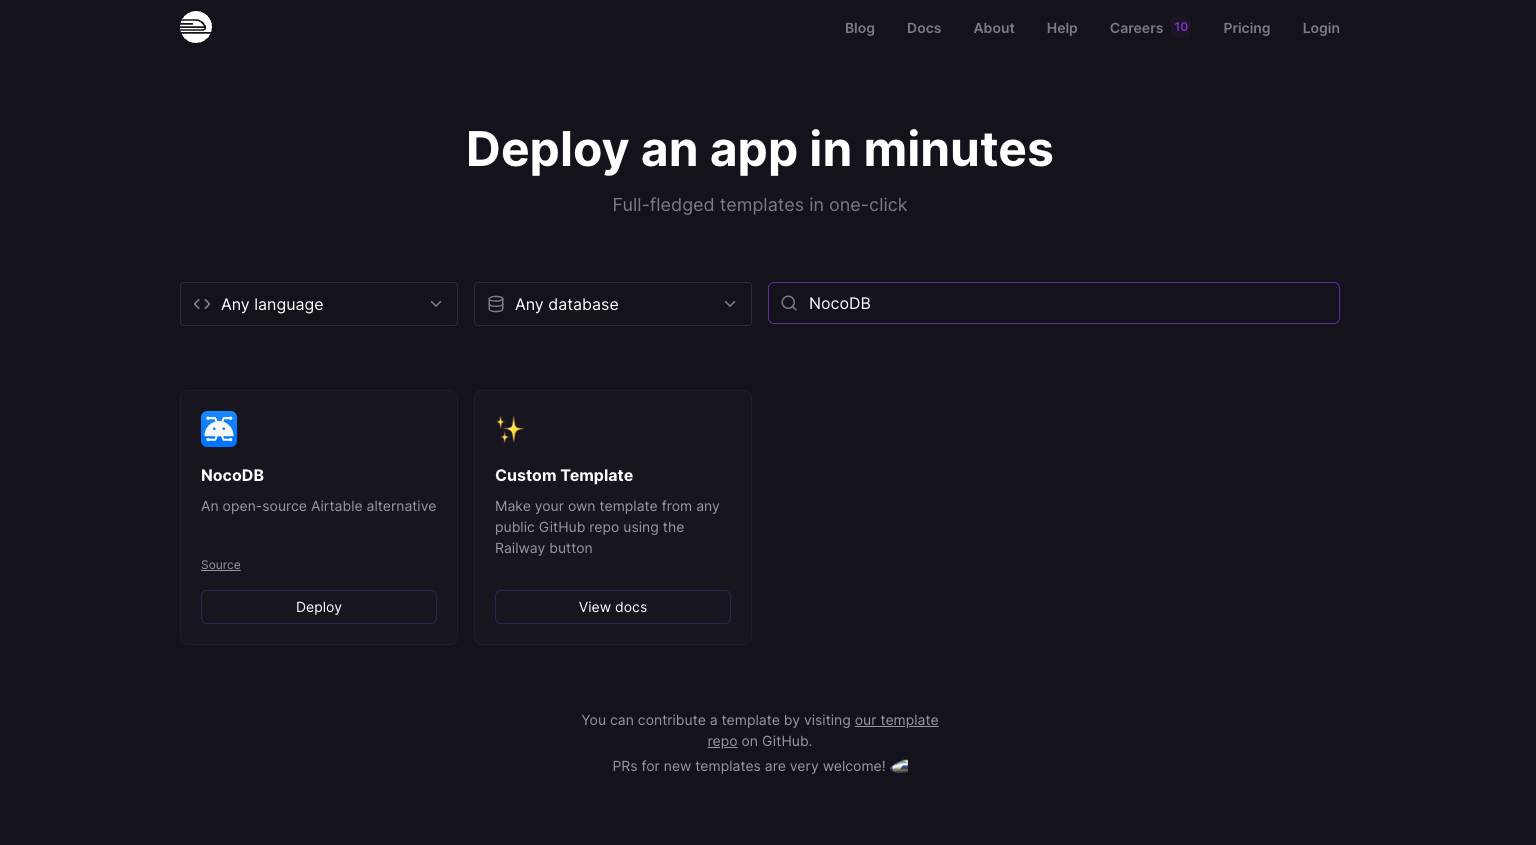
#### Navigate to Templates
Go to [Templates](https://railway.app/templates), Search NocoDB and click Deploy
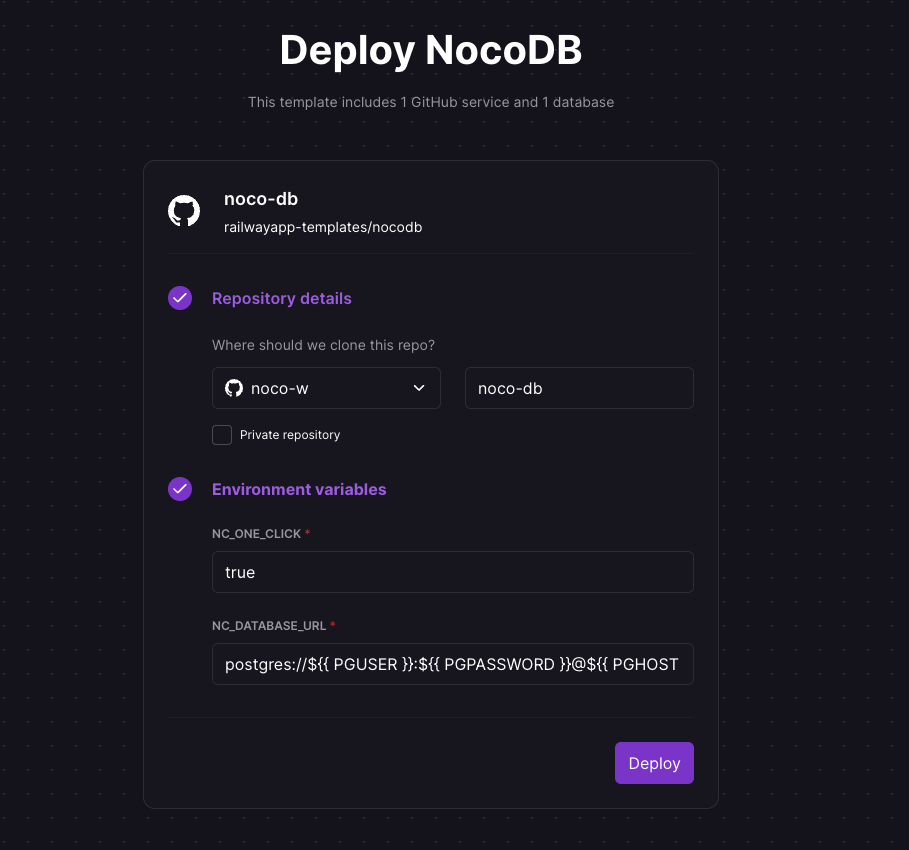
#### Configure NocoDB and Deploy
## Production Setup
It is mandatory to configure `NC_DB` environment variables for production usecases.
### Environment variables
| Variable | Mandatory | Comments | If absent | |
|------------------------------------|-----------|-------------------------------------------------------------------------------------------------------------------------|------------------------------------------------------------------------------------------------|---|
| NC_DB | Yes | See our database URLs | A local SQLite will be created in root folder | |
| NC_DB_JSON | Yes | Can be used instead of `NC_DB` and value should be valid knex connection JSON | | |
| NC_DB_JSON_FILE | Yes | Can be used instead of `NC_DB` and value should be a valid path to knex connection JSON | | |
| DATABASE_URL | No | JDBC URL Format. Can be used instead of NC_DB. Used in 1-Click Heroku deployment | | |
| DATABASE_URL_FILE | No | Can be used instead of DATABASE_URL: path to file containing JDBC URL Format. | | |
| NC_AUTH_JWT_SECRET | Yes | JWT secret used for auth and storing other secrets | A Random secret will be generated | |
| PORT | No | For setting app running port | `8080` | |
| DB_QUERY_LIMIT_DEFAULT | No | Default pagination limit | 25 | |
| DB_QUERY_LIMIT_MAX | No | Maximum allowed pagination limit | 1000 | |
| DB_QUERY_LIMIT_MIN | No | Minimum allowed pagination limit | 1 | |
| NC_TOOL_DIR | No | App directory to keep metadata and app related files | Defaults to current working directory. In docker maps to `/usr/app/data/` for mounting volume. | |
| NC_PUBLIC_URL | Yes | Used for sending Email invitations | Best guess from http request params | |
| NC_JWT_EXPIRES_IN | No | JWT token expiry time | `10h` | |
| NC_CONNECT_TO_EXTERNAL_DB_DISABLED | No | Disable Project creation with external database | | |
| NC_INVITE_ONLY_SIGNUP | No | Allow users to signup only via invite url, value should be any non-empty string. | | |
| NC_BACKEND_URL | No | Custom Backend URL | ``http://localhost:8080`` will be used | |
| NC_REQUEST_BODY_SIZE | No | Request body size [limit](https://expressjs.com/en/resources/middleware/body-parser.html#limit) | `1048576` | |
| NC_EXPORT_MAX_TIMEOUT | No | After NC_EXPORT_MAX_TIMEOUT csv gets downloaded in batches | Default value 5000(in millisecond) will be used | |
| NC_DISABLE_TELE | No | Disable telemetry | | |
| NC_DASHBOARD_URL | No | Custom dashboard url path | `/dashboard` | |
| NC_GOOGLE_CLIENT_ID | No | Google client id to enable google authentication | | |
| NC_GOOGLE_CLIENT_SECRET | No | Google client secret to enable google authentication | | |
| NC_MIGRATIONS_DISABLED | No | Disable NocoDB migration | | |
| NC_ONE_CLICK | No | Used for Heroku one-click deployment | | |
| NC_MIN | No | If set to any non-empty string the default splash screen(initial welcome animation) and matrix screensaver will disable | | |
| NC_SENTRY_DSN | No | For Sentry monitoring | | |
| NC_REDIS_URL | No | Custom Redis URL. Example: `redis://:authpassword@127.0.0.1:6380/4` | Meta data will be stored in memory | |
| NC_DISABLE_ERR_REPORT | No | Disable error reporting | | |
| NC_DISABLE_CACHE | No | To be used only while debugging. On setting this to `true` - meta data be fetched from db instead of redis/cache. | `false` | |
| NC_BASEURL_INTERNAL | No | Used as base url for internal(server) API calls | Default value in docker will be `http://localhost:$PORT` and in all other case it's populated from request object | |
| AWS_ACCESS_KEY_ID | No | For Litestream - S3 access key id | If Litestream is configured and NC_DB is not present. SQLite gets backed up to S3 | |
| AWS_SECRET_ACCESS_KEY | No | For Litestream - S3 secret access key | If Litestream is configured and NC_DB is not present. SQLite gets backed up to S3 | |
| AWS_BUCKET | No | For Litestream - S3 bucket | If Litestream is configured and NC_DB is not present. SQLite gets backed up to S3 | |
| AWS_BUCKET_PATH | No | For Litestream - S3 bucket path (like folder within S3 bucket) | If Litestream is configured and NC_DB is not present. SQLite gets backed up to S3 | |
| NC_SMTP_FROM | No | For SMTP plugin - Email sender address | | |
| NC_SMTP_HOST | No | For SMTP plugin - SMTP host value | | |
| NC_SMTP_PORT | No | For SMTP plugin - SMTP port value | | |
| NC_SMTP_USERNAME | No | For SMTP plugin (Optional) - SMTP username value for authentication | | |
| NC_SMTP_PASSWORD | No | For SMTP plugin (Optional) - SMTP password value for authentication | | |
| NC_SMTP_SECURE | No | For SMTP plugin (Optional) - To enable secure set value as `true` any other value treated as false | | |
| NC_SMTP_IGNORE_TLS | No | For SMTP plugin (Optional) - To ignore tls set value as `true` any other value treated as false. For more info visit https://nodemailer.com/smtp/ | | |
| NC_S3_BUCKET_NAME | No | For S3 storage plugin - AWS S3 bucket name | | |
| NC_S3_REGION | No | For S3 storage plugin - AWS S3 region | | |
| NC_S3_ACCESS_KEY | No | For S3 storage plugin - AWS access key credential for accessing resource | | |
| NC_S3_ACCESS_SECRET | No | For S3 storage plugin - AWS access secret credential for accessing resource | | |
| NC_ADMIN_EMAIL | No | For updating/creating super admin with provided email and password | | |
| NC_ADMIN_PASSWORD | No | For updating/creating super admin with provided email and password. Your password should have at least 8 letters with one uppercase, one number and one special letter(Allowed special chars $&+,:;=?@#|'.^*()%!_-" ) | | |
| NODE_OPTIONS | No | For passing Node.js [options](https://nodejs.org/api/cli.html#node_optionsoptions) to instance | | |
| NC_MINIMAL_DBS | No | Create a new SQLite file for each project. All the db files are stored in `nc_minimal_dbs` folder in current working directory. (This option restricts project creation on external sources) | | |
## Sample Demos
### Code Sandbox
### Docker deploying with one command
### Using NPX
### Heroku Deployment
 ### Homebrew
```bash
brew tap nocodb/nocodb
brew install nocodb
nocodb
```
### Executables
You can download executables directly and run without any extra dependancy. Use the right command based on your platform.
##### MacOS (x64)
```bash
curl http://get.nocodb.com/macos-x64 -o nocodb -L \
&& chmod +x nocodb \
&& ./nocodb
```
##### MacOS (arm64)
```bash
curl http://get.nocodb.com/macos-arm64 -o nocodb -L \
&& chmod +x nocodb \
&& ./nocodb
```
##### Linux (x64)
```bash
curl http://get.nocodb.com/linux-x64 -o nocodb -L \
&& chmod +x nocodb \
&& ./nocodb
```
##### Linux (arm64)
```bash
curl http://get.nocodb.com/linux-arm64 -o nocodb -L \
&& chmod +x nocodb \
&& ./nocodb
```
##### Windows (x64)
```bash
iwr http://get.nocodb.com/win-x64.exe
.\Noco-win-x64.exe
```
##### Windows (arm64)
```bash
iwr http://get.nocodb.com/win-arm64.exe
.\Noco-win-arm64.exe
```
### Node Application
We provide a simple NodeJS Application for getting started.
```bash
git clone https://github.com/nocodb/nocodb-seed
cd nocodb-seed
npm install
npm start
```
### AWS ECS (Fargate)