---
title: 'Data Sources overview'
description: 'NocoDB Data-Source sync, access control & re-config'
---
## Overview
NocoDB allows you to connect to external data sources and get a unified spreadsheet view of your data. Activities related to external data sources can be managed from `Data Sources` tab in `Base dashboard` .
`Data Sources` tab includes following functionalities
1. Connect/manage external data source
2. UI Access Control
3. Relations
:::info
Currently only one external data source can be added per project.
:::
## Accessing `Data Sources`
1. Access Base context menu by clicking on the `Base` name in the left sidebar
2. Click on `Data Sources` tab

## Sync Metadata
1. Access Base context menu by clicking on the `Base` name in the left sidebar
2. Click on `Data Sources` tab
3. Click on `Sync Metadata` button listed under `Actions` column for the data source that you wish to sync metadata for
4. [**Optional**] Click on `Reload` button to refresh Sync state.
5. Any changes to the metadata identified will be listed in the `Sync State` column
6. Click on `Sync Now` button to sync the metadata changes


After the sync is complete, you can see the updated state in the `Sync State` column. Sync modal also marks `Tables metadata is in Sync` in the header.

## UI Access Control
1. Access Base context menu by clicking on the `Base` name in the left sidebar
2. Click on `Data Sources` tab
3. Click on `UI ACL` button listed under `Actions` column for the data source that you wish to manage UI access control for
4. On the UI ACL modal, you can see the list of tables available in the data source as rows & roles available as columns. Toggle checkboxes to enable/disable access to tables for specific roles.
5. Click on `Save` button to save the changes


## Relations
1. Access Base context menu by clicking on the `Base` name in the left sidebar
2. Click on `Data Sources` tab
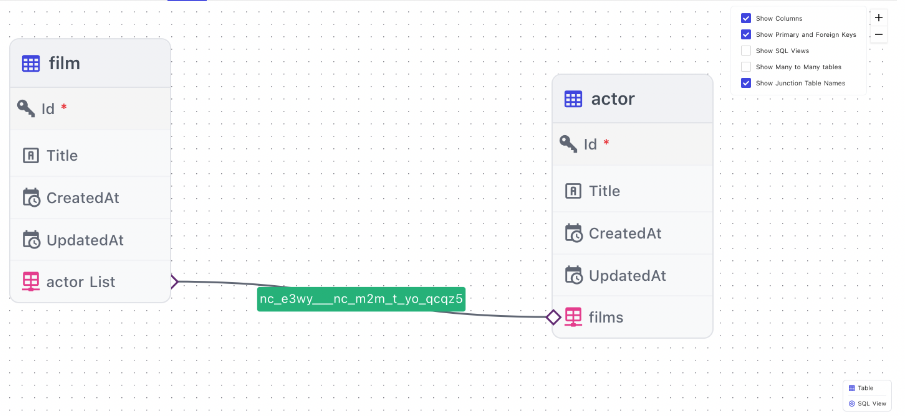
3. Click on `Relations` button listed under `Actions` column for the data source that you wish to access ERD (Relations view) for


### Junction table names within Relations
- Enable `Show M2M Tables` within `Project Settings` menu
- Double-click on `Show Columns` to see additional checkboxes get enabled.
- Enabling which you should be able to see junction tables and their table names.

## Edit external database configuration parameters
1. Access Base context menu by clicking on the `Base` name in the left sidebar
2. Click on `Data Sources` tab
3. Click on `Edit` icon listed under `Actions` column for the data source that you wish to access ERD (Relations view) for
Go to `Data Sources` , click ``Edit`` icon, you can re-configure database credentials.
Please make sure database configuration parameters are valid. Any incorrect parameters could lead to schema loss!


## Unlink data source
1. Access Base context menu by clicking on the `Base` name in the left sidebar
2. Click on `Data Sources` tab
3. Click on `Delete` icon listed under `Actions` column for the data source that you wish to Unlink

## Data source visibility
1. Access Base context menu by clicking on the `Base` name in the left sidebar
2. Click on `Data Sources` tab
3. Toggle radio button listed under `Visibility` column for the data source that you wish to hide/un-hide
